Attending courses and reading books (and blogs) is all well and good but ultimately the only way to become capable, and hopefully even good, at something is to actually go out there and do it. For some time now I’ve been reading up on off-camera flash and even dabbling with a few still life shots using various bits of kit I’ve acquired. I’ve now decided to step up a gear and start creating some more serious portraits using off-camera flash. This and an upcoming post document my experiences and learning’s. Here I look at the kit for doing off-camera flash and subsequently I’ll show how I approached a shoot and what lighting setups I used.
The ultimate resource for learning off-camera flash is from the person who pretty much invented the whole movement David Hobby’s strobist blog. You’ll find a wealth of information on how to get started including detailed descriptions of various bits of kit to get you up and running. What I list here is not the cheapest (and certainly not the most expensive) but is what I have found to work for me with my current camera, the Olympus OM-D E-M5.
- A flashgun (AKA “strobe”). The first and most obvious thing you need is a light source!. The temptation with flashguns is to go with those from the manufacturer of your camera as they will be matched for full exposure control when mounted on the camera or when off-camera using the cameras own remote control mechanism (which is usually infra-red or from a camera mounted flashgun). However, given the whole idea of off-camera flash is that the flash is not on the camera, and you are using radio triggers (or cable) then you can usually get more for your money by getting a third party flash from the likes of Metz, Nissin etc. That said I have a Canon 430EX II (for historic reasons) and Olympus FL-600R.
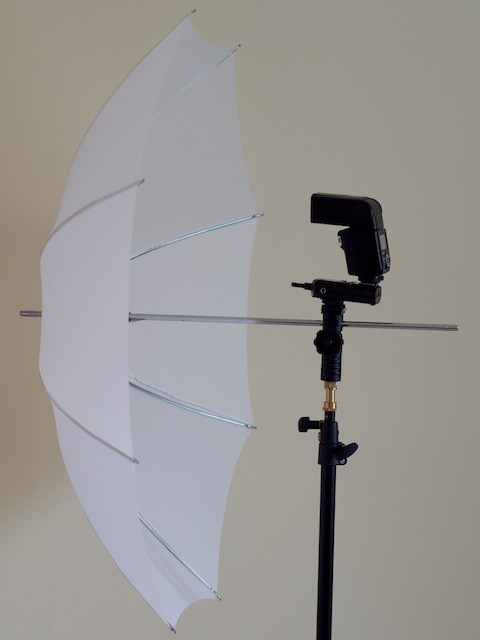
- A light stand. You need a stand to mount your flashgun on. Whilst most flashguns do come with a mini stand which means they can be stood on any flat surface you are obviously limited to there being suitable surfaces near where you are shooting so you will need some way of placing your flash where you want it to go. The stands I have are Manfrotto 5001B Nano’s which are nice and light and ideal for small electronic flash guns and a light modifier. The feet pretty much go flat which means you can get your flash low down if required. Flashguns cannot be mounted directly onto a stand so you’ll need one or more of the next item.
- An umbrella swivel or “tilthead”. This gizmo fits onto the light stand and has a hot shoe which allows you to slide a flashgun onto it. The model I use, the Lastolite Tilthead with Hotshoe which also swivels allowing you to point your flash up and down and has a socket allowing you to mount an umbrella which will tilt with the flash. An umbrella is referred to as a “light modifier” because it diffuses the light and gives a softer effect than the “bare flash” (i.e. no light modifiers). So, you’ll need the next item as well.
- A light modifier. Whilst you can use “bare flash” it’s usually the case that you want to “modify” the light in some way. This could be by diffusing it, focusing it, colouring it or doing numerous other things with it. As a minimum you should probably go with a white, shoot through umbrella AKA a “brolly”) such as the Lastolite 80cm one. Light modifiers are something you can really go to town with. You can pretty much get anything for off-camera flash that you can get for studio flash including soft boxes, snoots, barn doors and gels to name but four. I also own a Lastolite Ezybox 54cm x 54cm soft box designed specially for fitting flashguns to. This folds away into a fairly small package and includes some additional bits for attaching your flashgun.
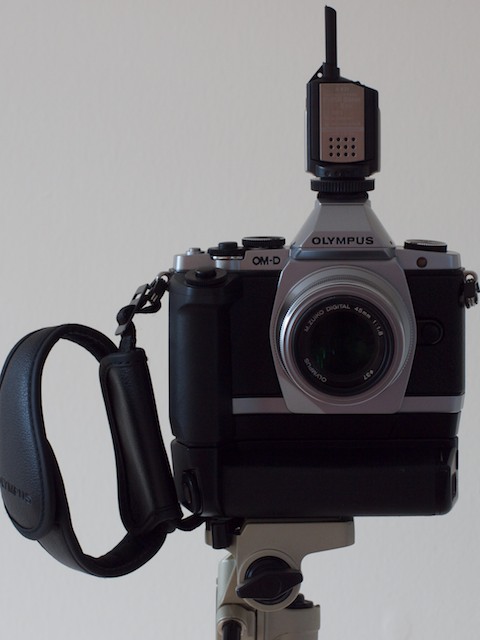
- A flash trigger. Next to the flashgun itself this is going to be the most expensive item to buy. The simplest flash trigger is a wire from your camera to the flashgun however this is so limiting (have your flashgun and camera got the right connectivity, the distance of your flashgun from the camera is limited by the length of wire, wires just get in the way etc) it’s not seriously worth considering. Ideally you will use one of the many wireless flash triggers there are on the market. The “gold standard” for flash triggers is probably those made by PocketWizard however these are pretty expensive and look, to me at least, a bit large and clumpy for the beautiful, slimline OM-D. After much deliberation, and a few false buys, I have decided to invest in Flash Wave III flash triggers (see video below). These are made by the Korean company SMDV and marketed by Lastolite in the UK and available from Warehouse Express as a transmitter/receiver pair or as individual receivers. You’ll need a receiver for each flashgun you want to fire remotely. Initial tests indicate these triggers are reliable (i.e. trigger the flash every time) and certainly the transmitter looks pretty nice on the OM-D. Since getting these Flash Wave triggers I’ve discovered some interesting ones from a Hong Kong company called Cactus which also look interesting. The key thing for me when getting triggers is that the receiver should have a hot shoe connection on the top and bottom so it can fit directly onto the tilthead and the flashgun can connect to the receiver.
These are the five essential bits of kit you need to do off-camera flash. See the pictures below for what this looks like when it’s all connected together.

If you want to see the Flash Wave III triggers in action here’s a video by PhotoTraining4U showing it in action:
and last but by no means least a video by Damian McGillicuddy showing the OM-D E-M1 in action with off-camera flash using their built in remote shooting capability (i.e. no separate flash triggers):
So that’s the kit sorted, next to try using it in earnest. Watch this space for the results of an upcoming studio shoot.


Leave a comment