I normally do my black and white conversions in Lightroom but for this post thought I would just experiment with Photoshop. A kind of jamming session but using Photoshop rather than a musical instrument.
Here’s the image I’m starting with. All I’ve done with it at this stage (in Lightroom) is to crop it to get rid of some of the background making it slightly more centred (i.e. using a 10×8 rather than the in-camera 4×3 crop).
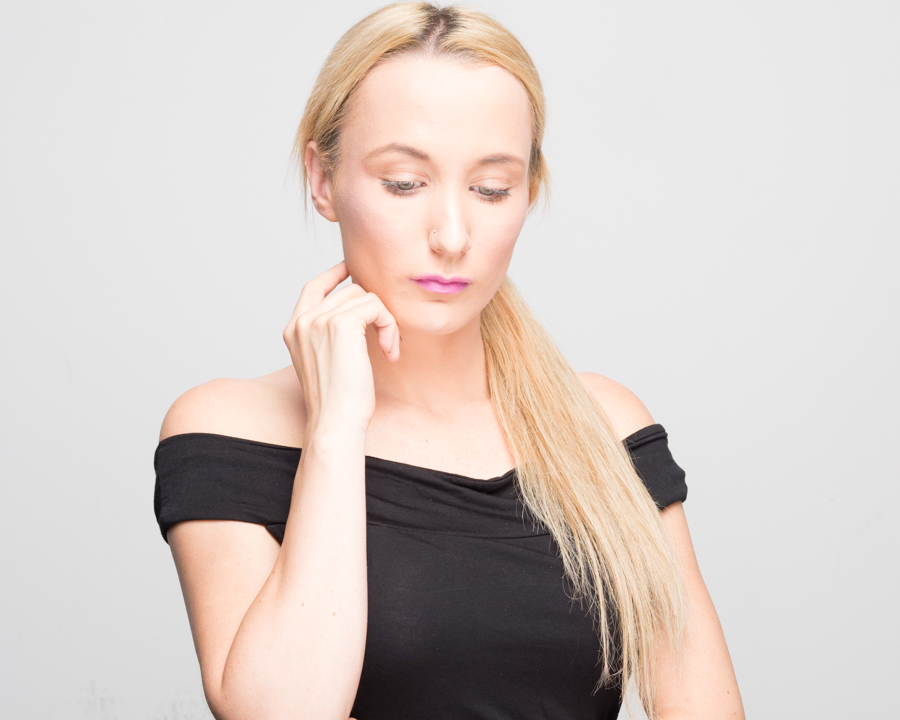
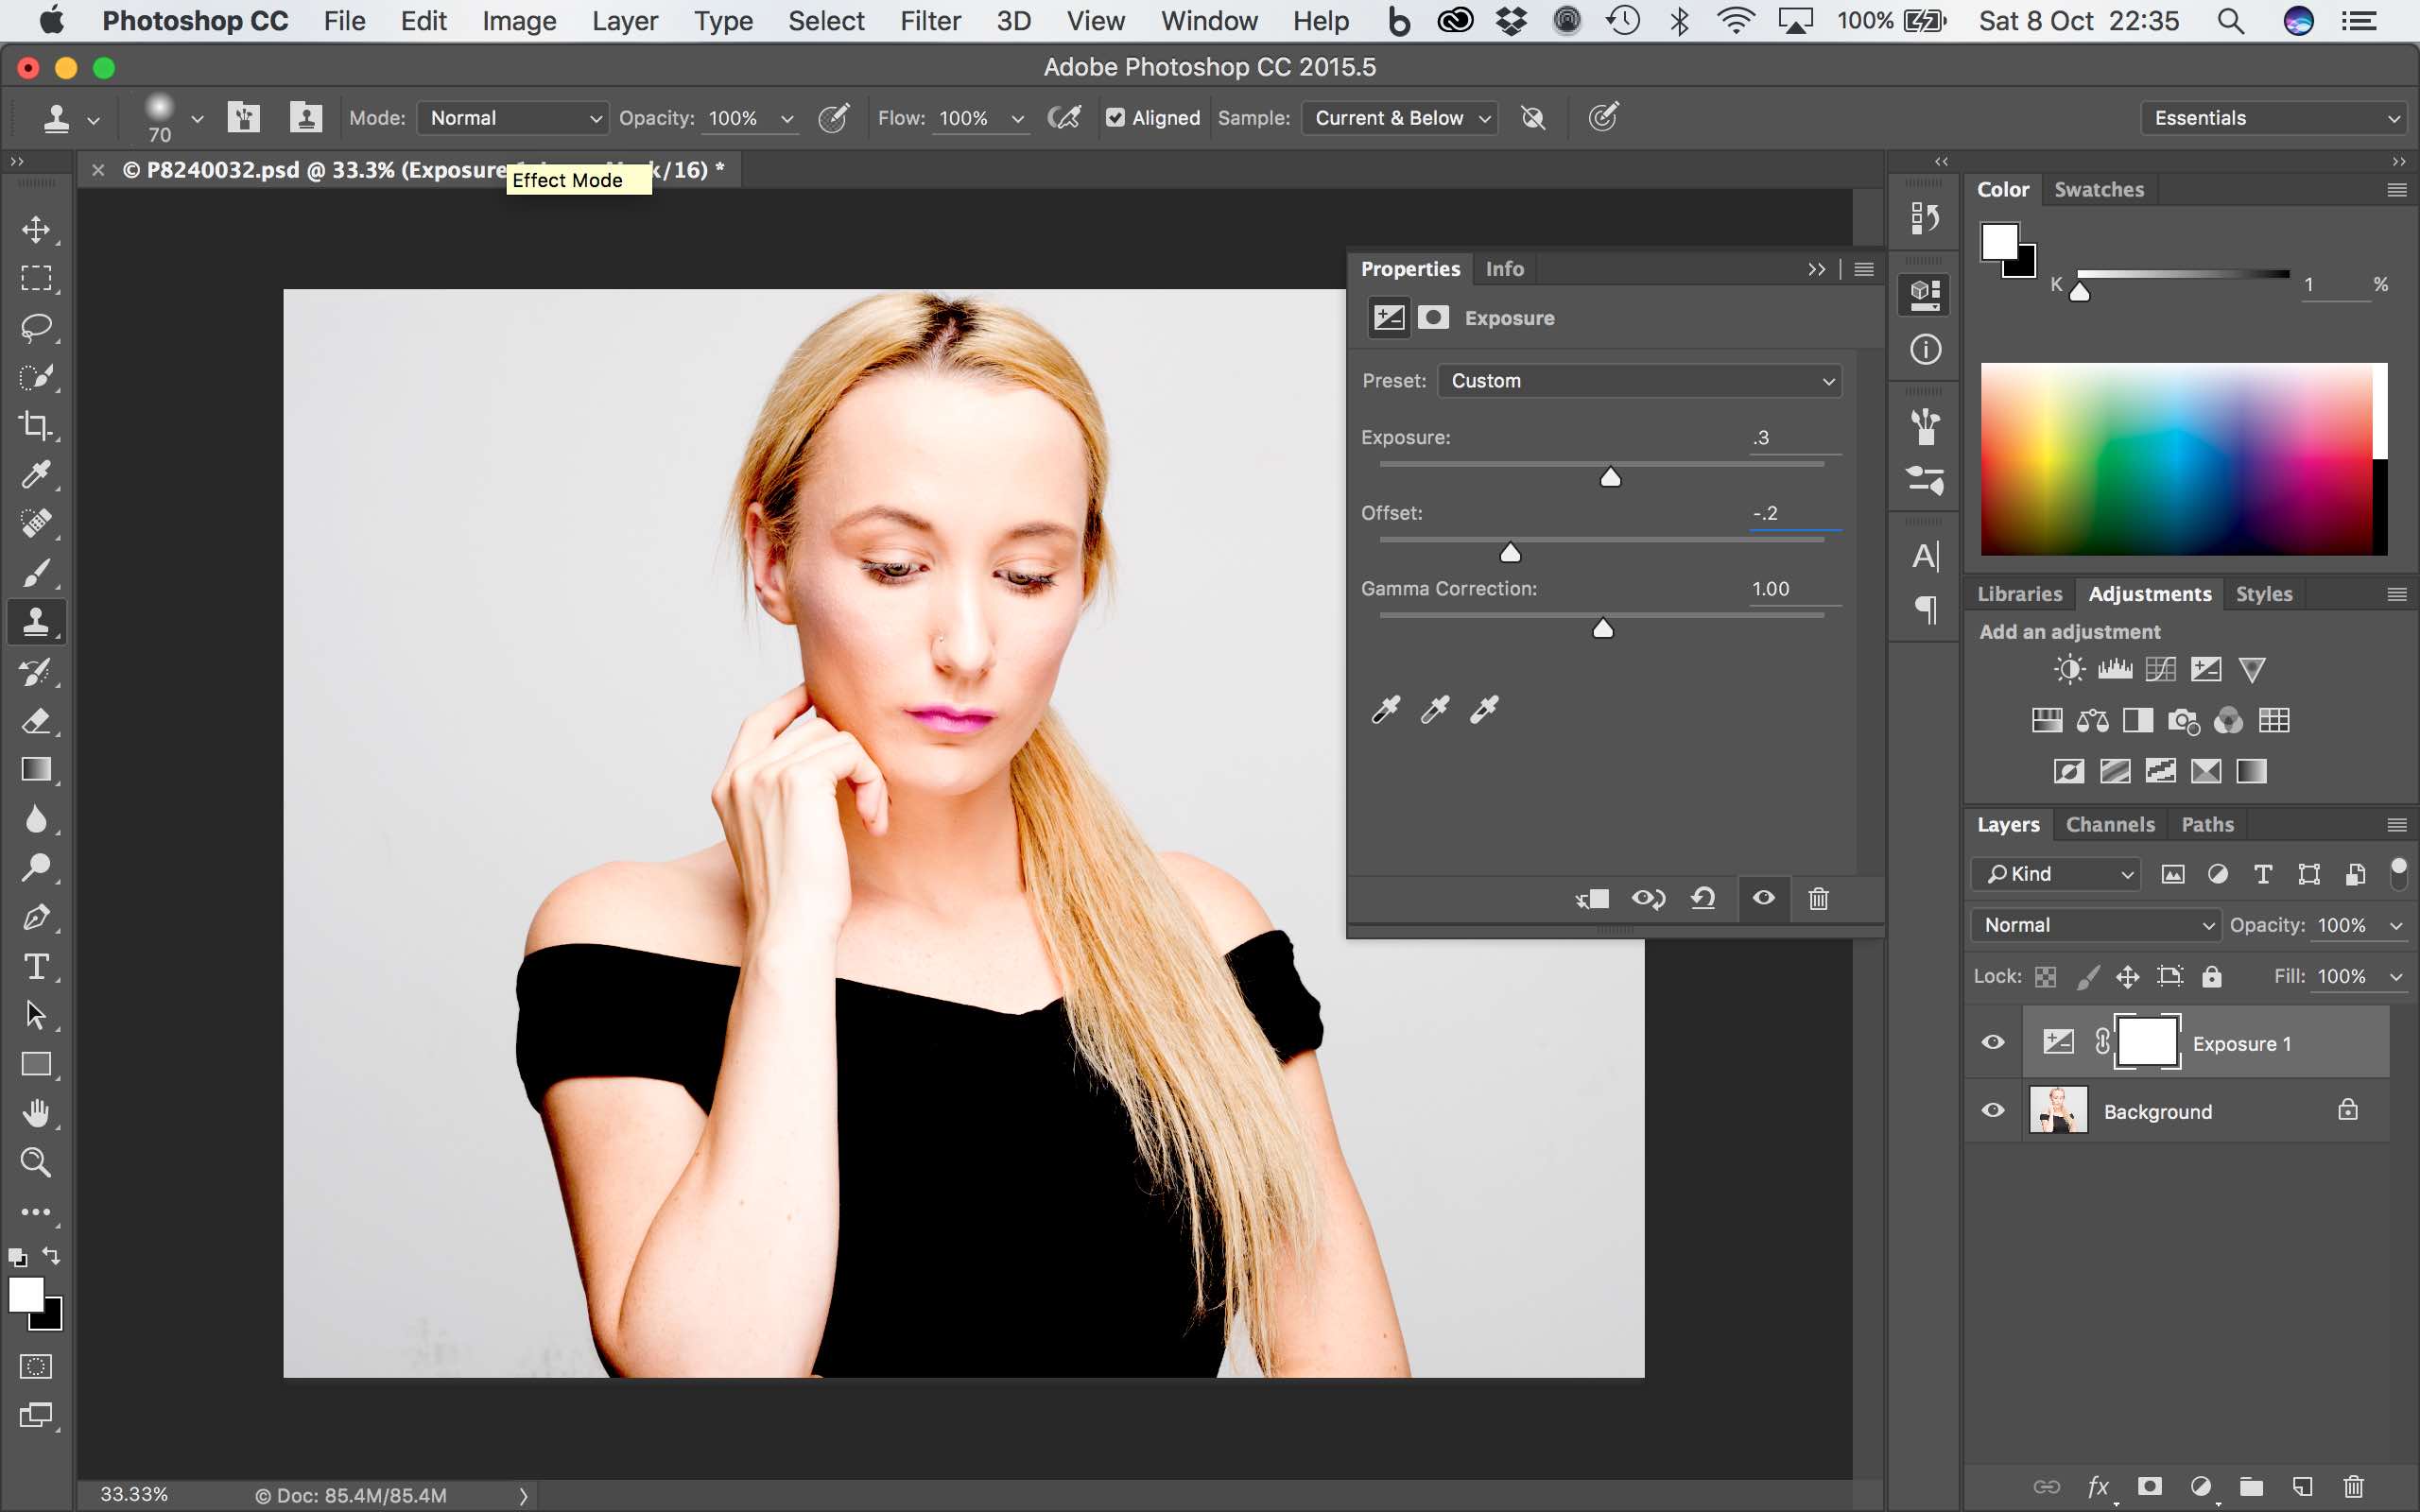
That’s all I want to do in Lightroom so next I open up the image in Photoshop using my workflow as described here. I have a vague idea at this point that I want the image to not only be black and white but quite grainy like ‘pushed’ film would be. It’s a fairly high key image but I want to see whether it looks better with a bit more of an exposure increase so I’m going to select the exposure adjustment layer from the adjustment palette.
Playing around with the sliders I quite like a slight increase in exposure (0.3) and decrease in the offset (-0.2) which increases contrast a little.
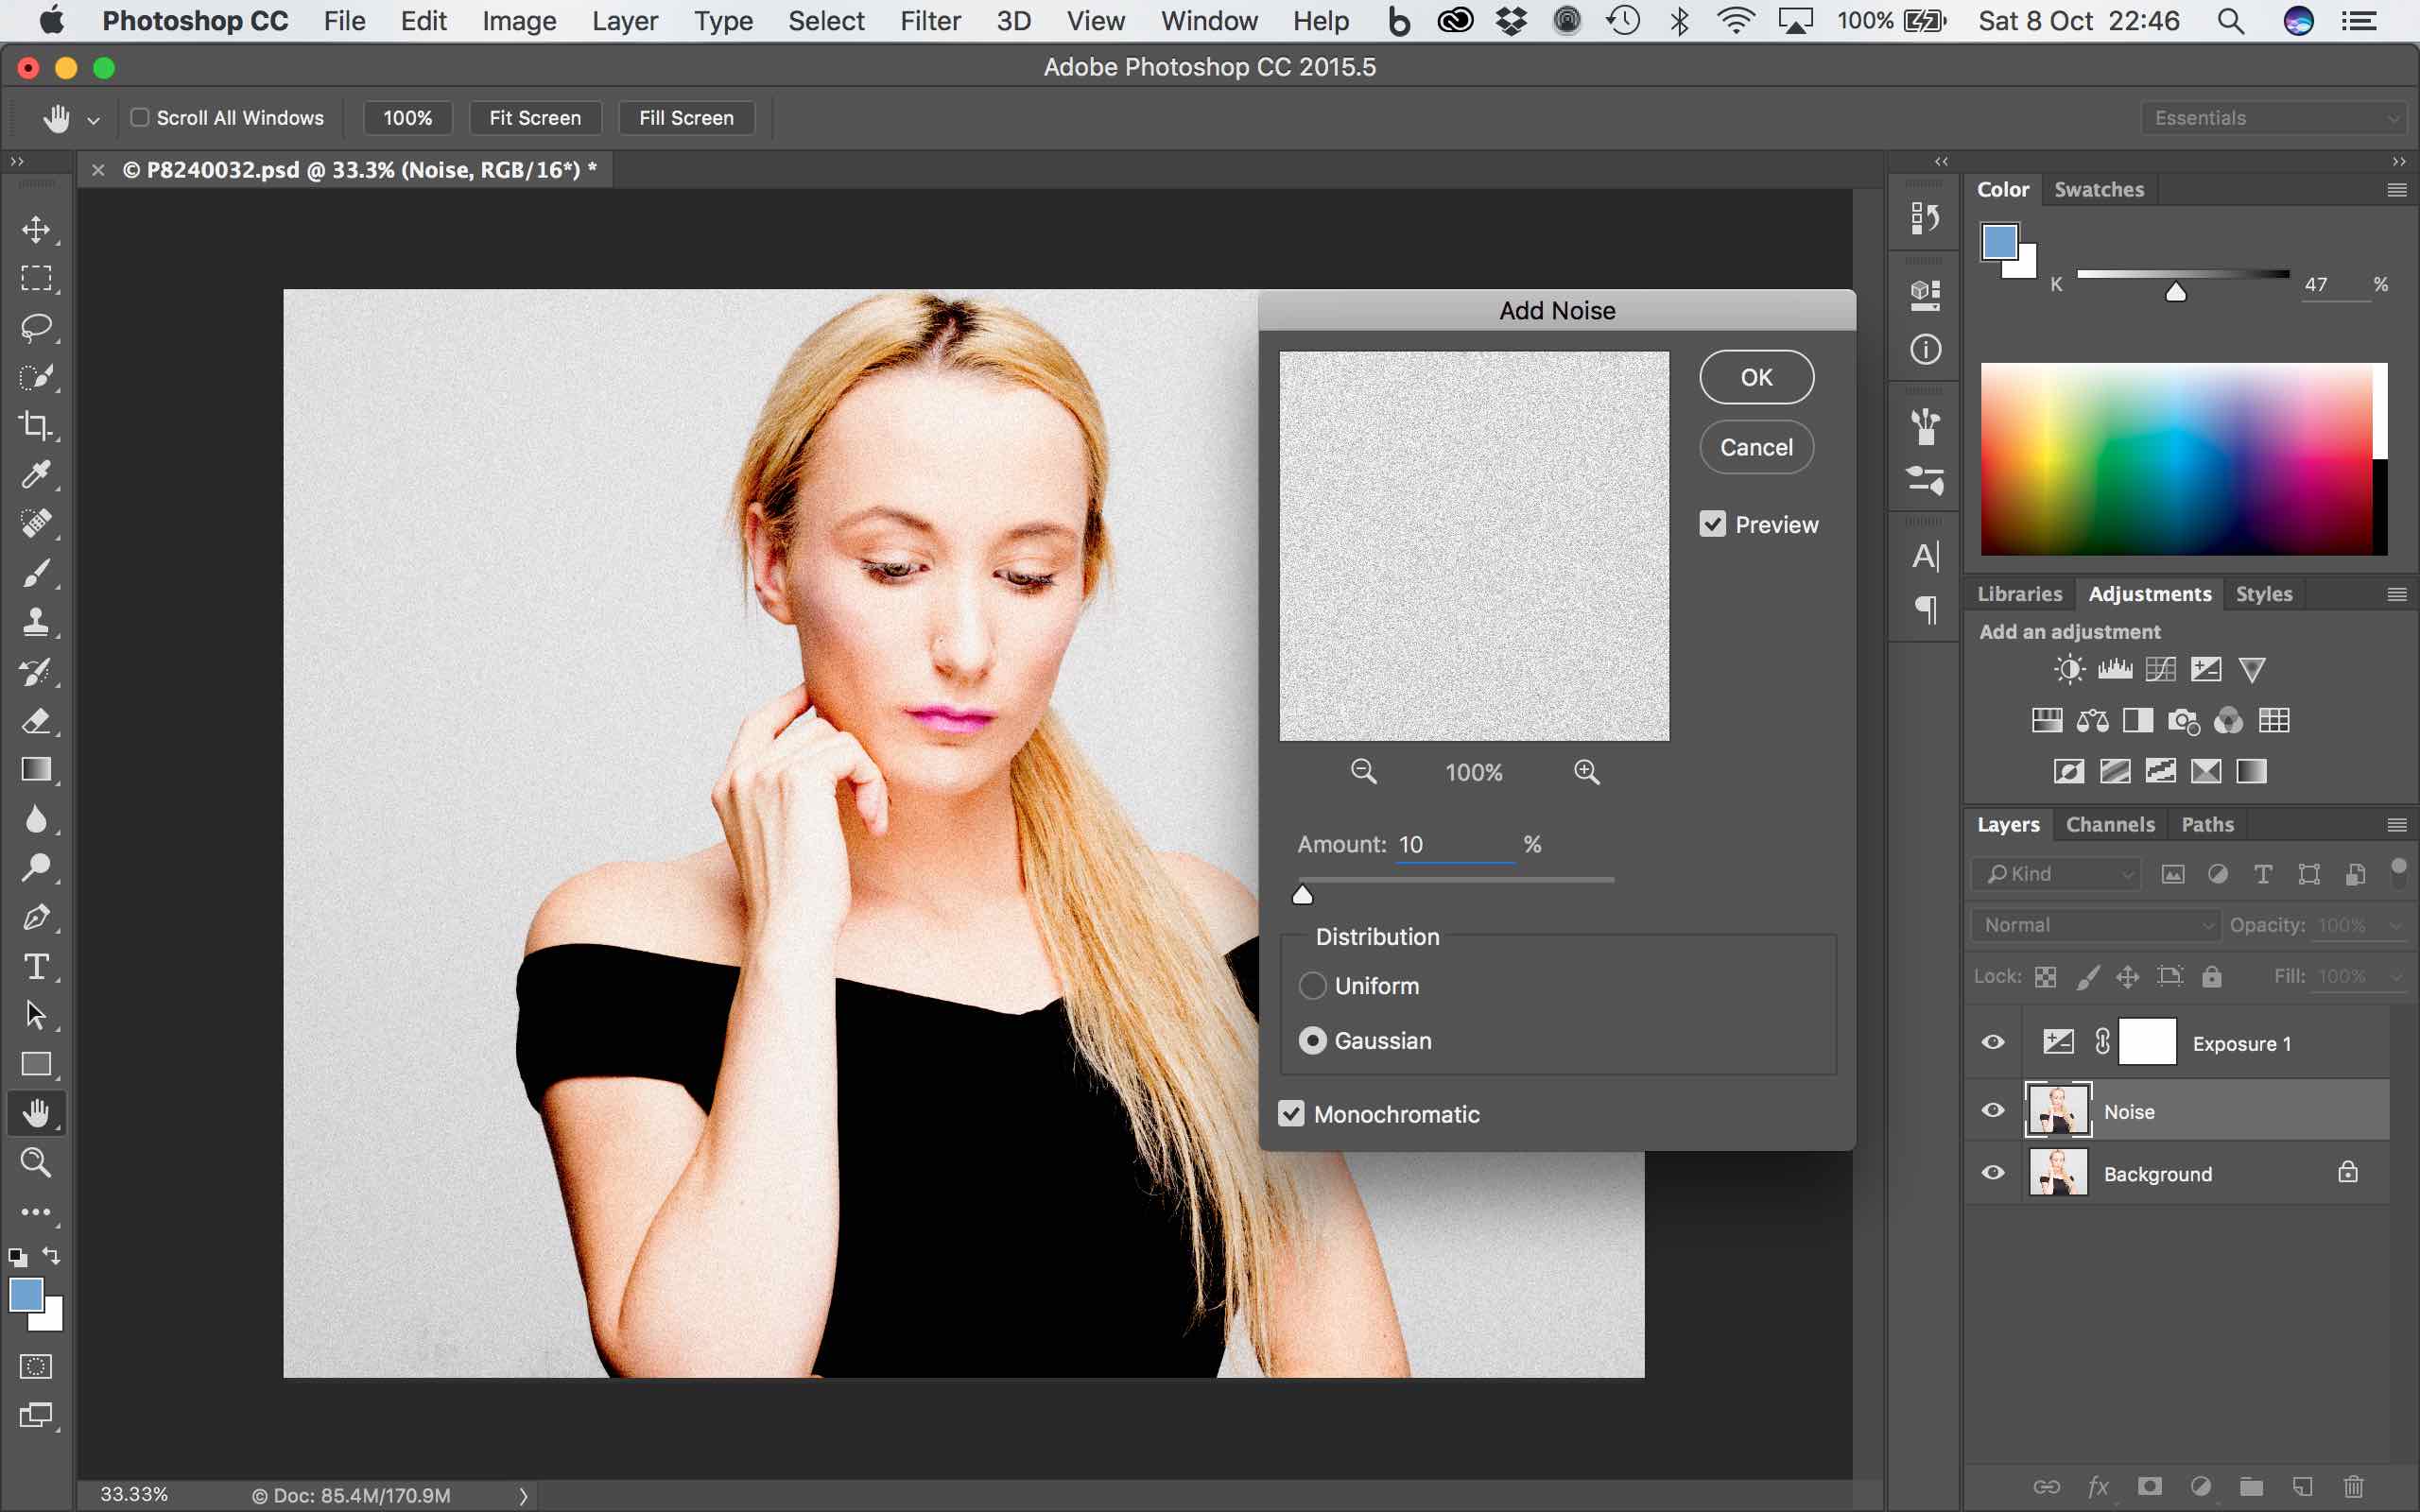
Before I convert to black and white I’m going to add a bit of noise to simulate the film grain. To do this I copy the background layer (Cmd J) and rename it to ‘Noise’. Next, making sure this layer is selected I chose Filter/Noise/Add Noise… from the menu bar. Playing around with the sliders in the ‘Add Noise’ window I decide an ‘Amount’ of ’10’ together with ‘Gaussian’ and ‘Monochromatic’ options selected gives me the look I’m after.
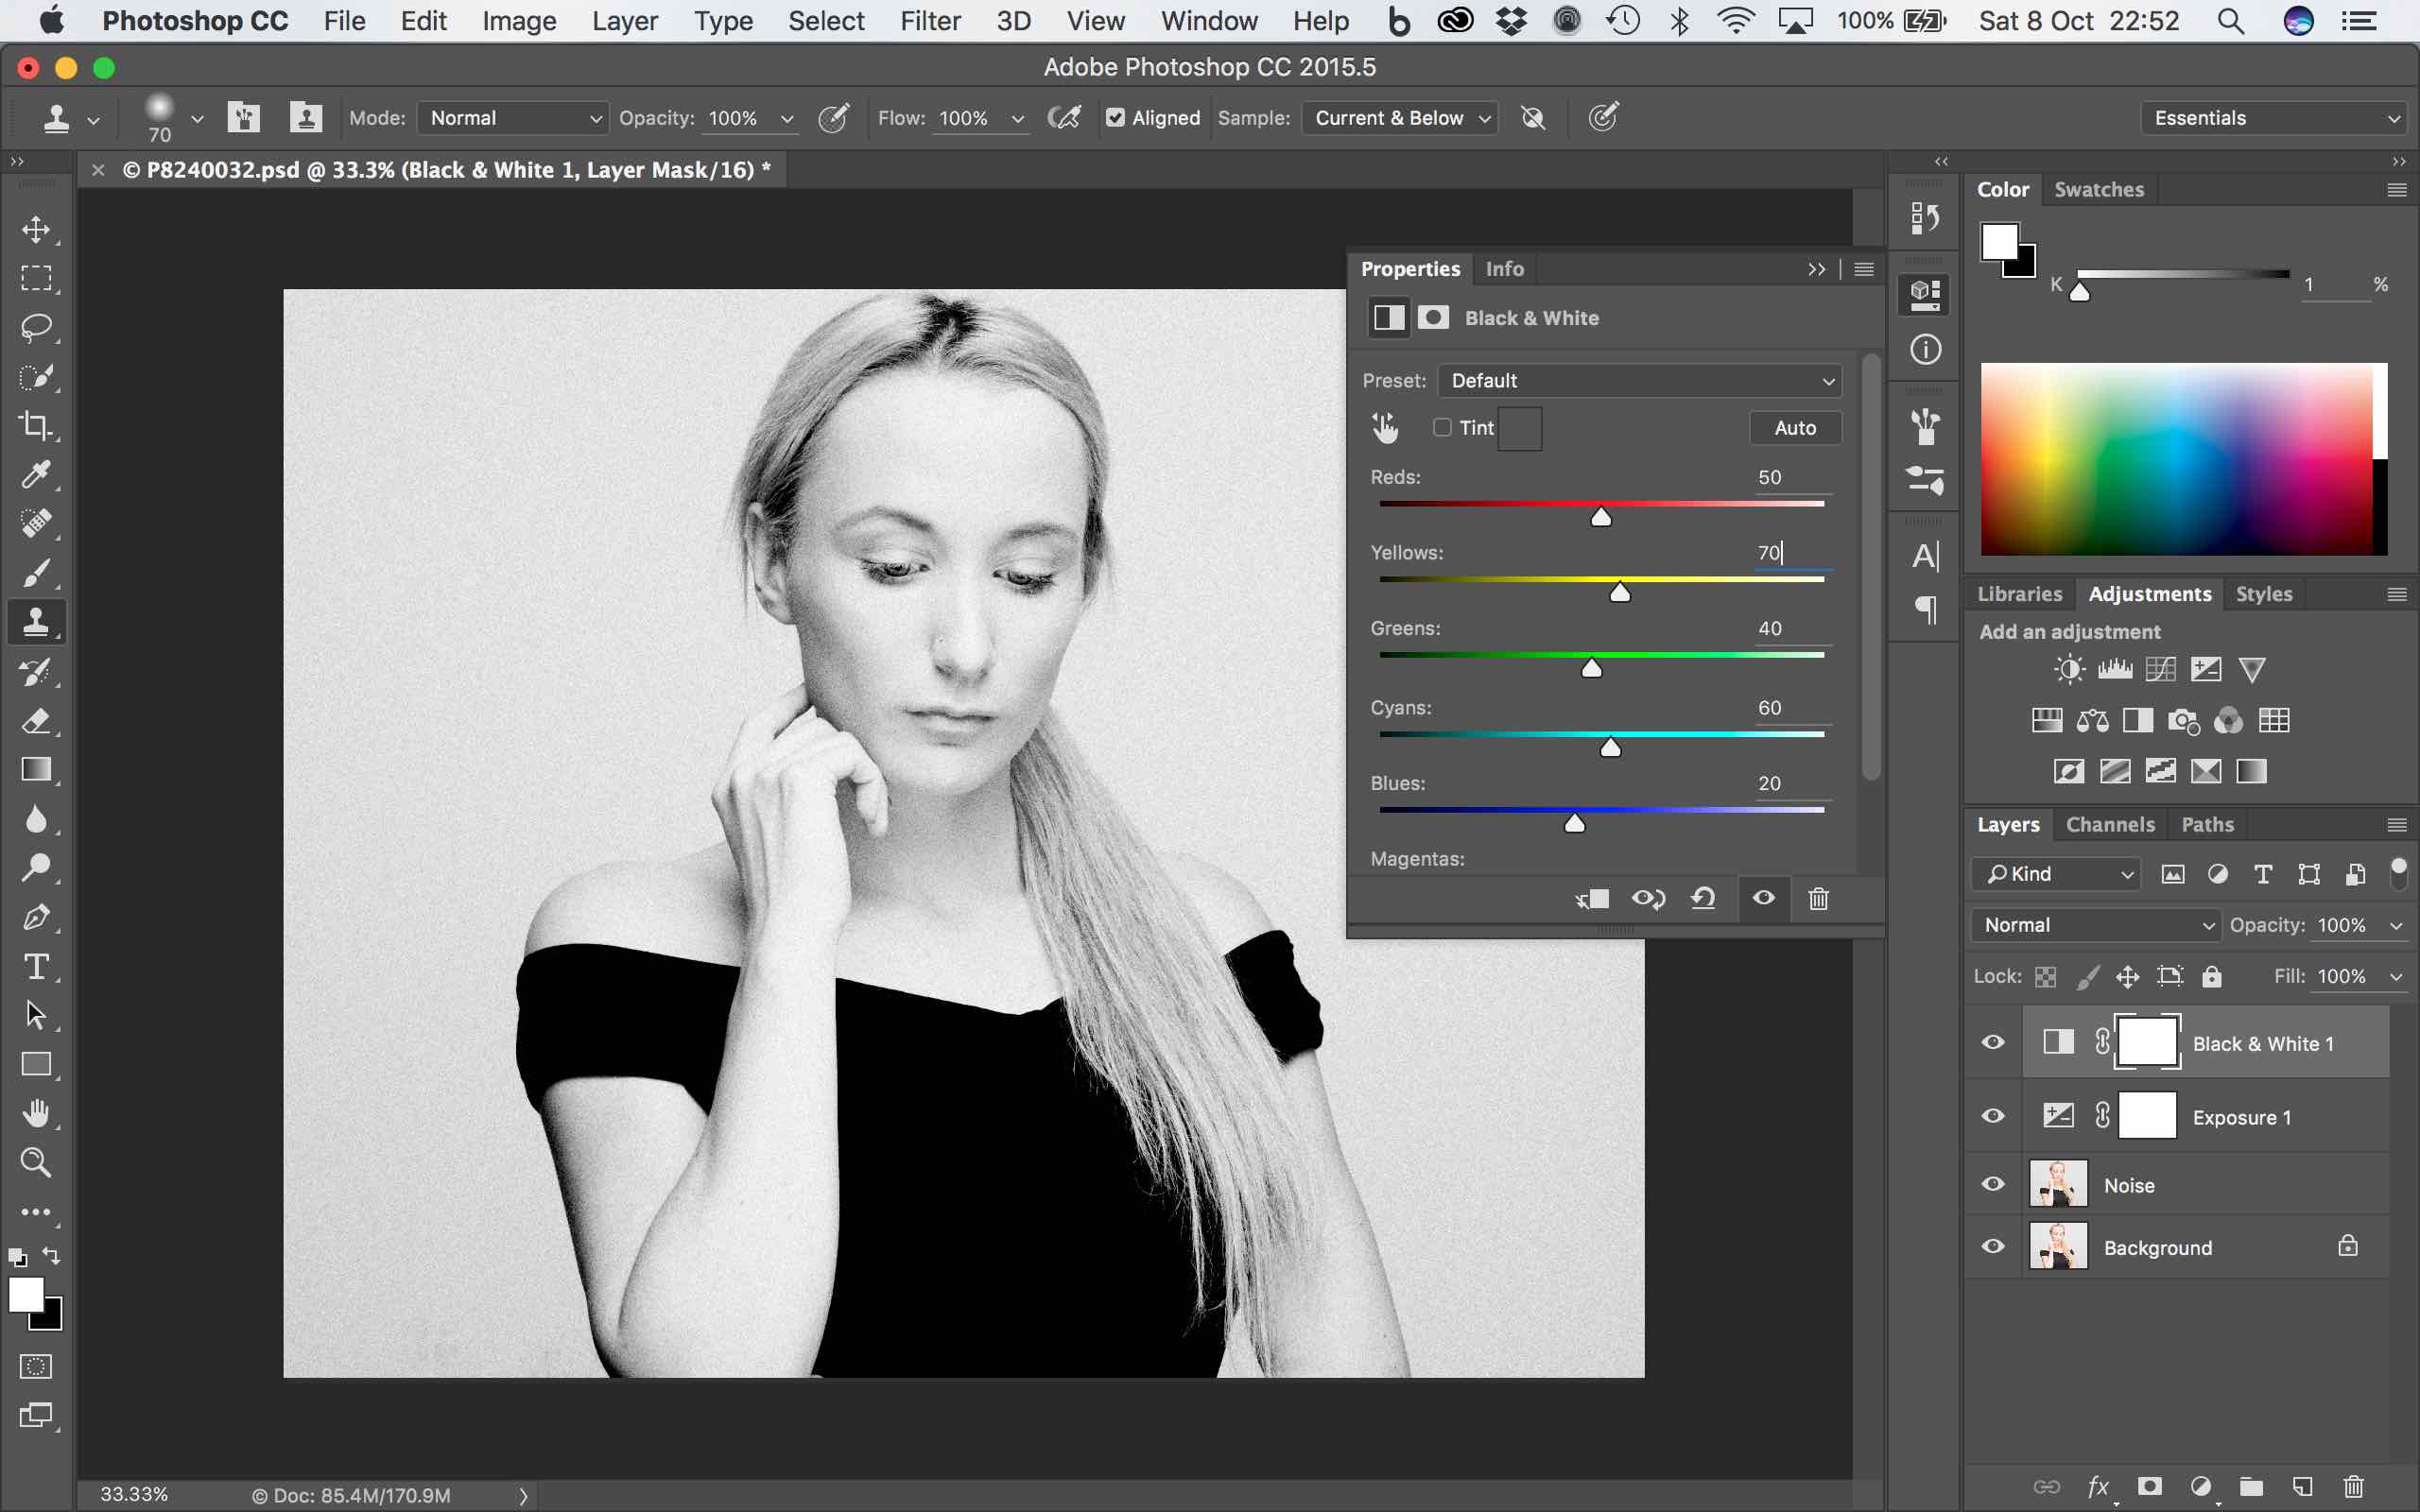
Next up is the conversion to black and white. There are numerous ways of doing this in Photoshop but I’m simply going to use the ‘Black & White’ adjustment layer. Playing around with the red and yellow sliders (the only ones which really effect skin tone) I bump each up by 10 from the defaults (i.e. red from 30 to 40 and yellow from 60 to 70). This has the effect of lightening the skin by the desired amount.
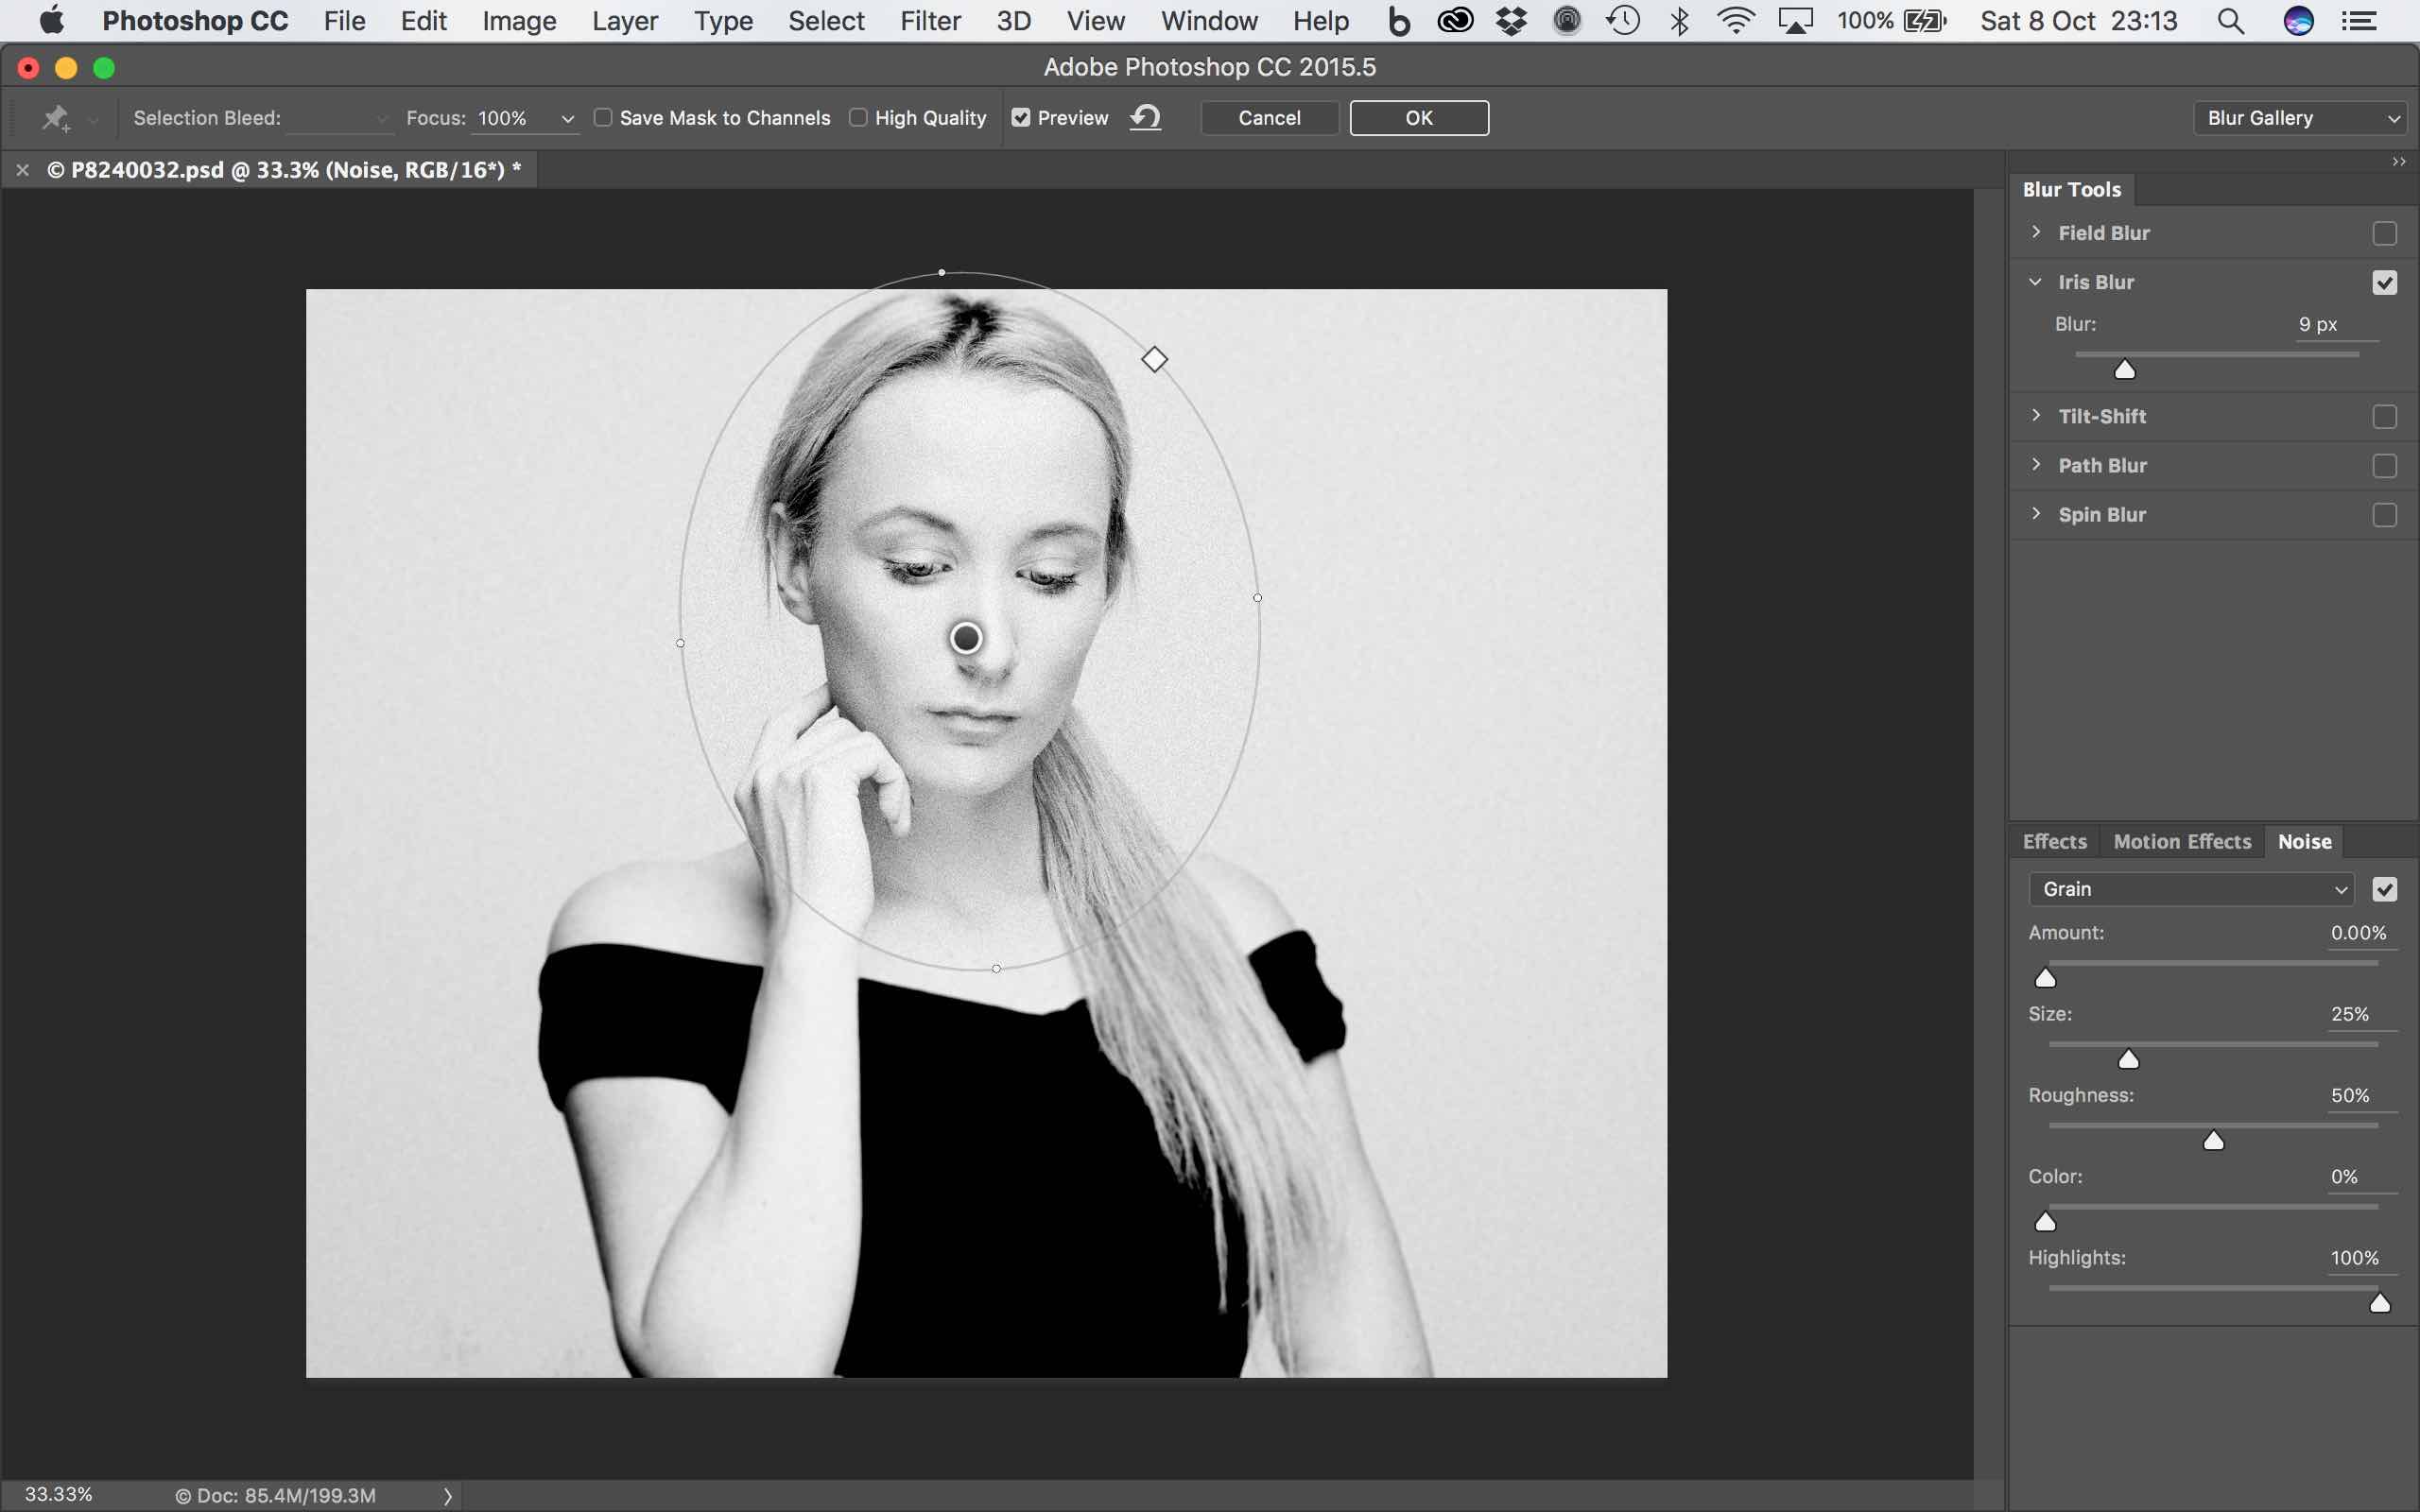
As a final edit I’m going to try and create a bokeh effect by blurring slightly the models body and just keeping her face sharp. It’s important not to overdo this otherwise it can look very false. The trick is to try and keep the blurring to the same plane. Selecting the ‘Noise’ layer I choose Filter/Blur Gallery/Iris Blur… from the menu and play around with the circle defining the sharp area. I try to keep this just to the models face and hand which is roughly in the same plane.
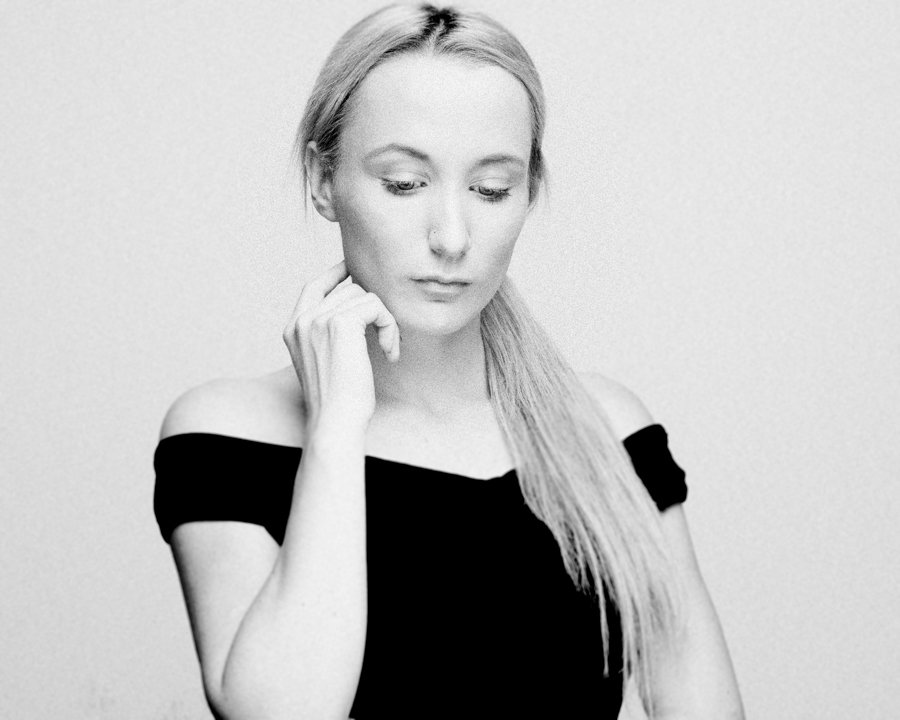
That’s all I’m going to do for now so the final step is to collapse all the layers (Layer/Flatten Image), assuming I won’t be going back to make any further adjustments, and save the image back to Lightroom. Here’s the final image. An improvement or not?


Leave a comment