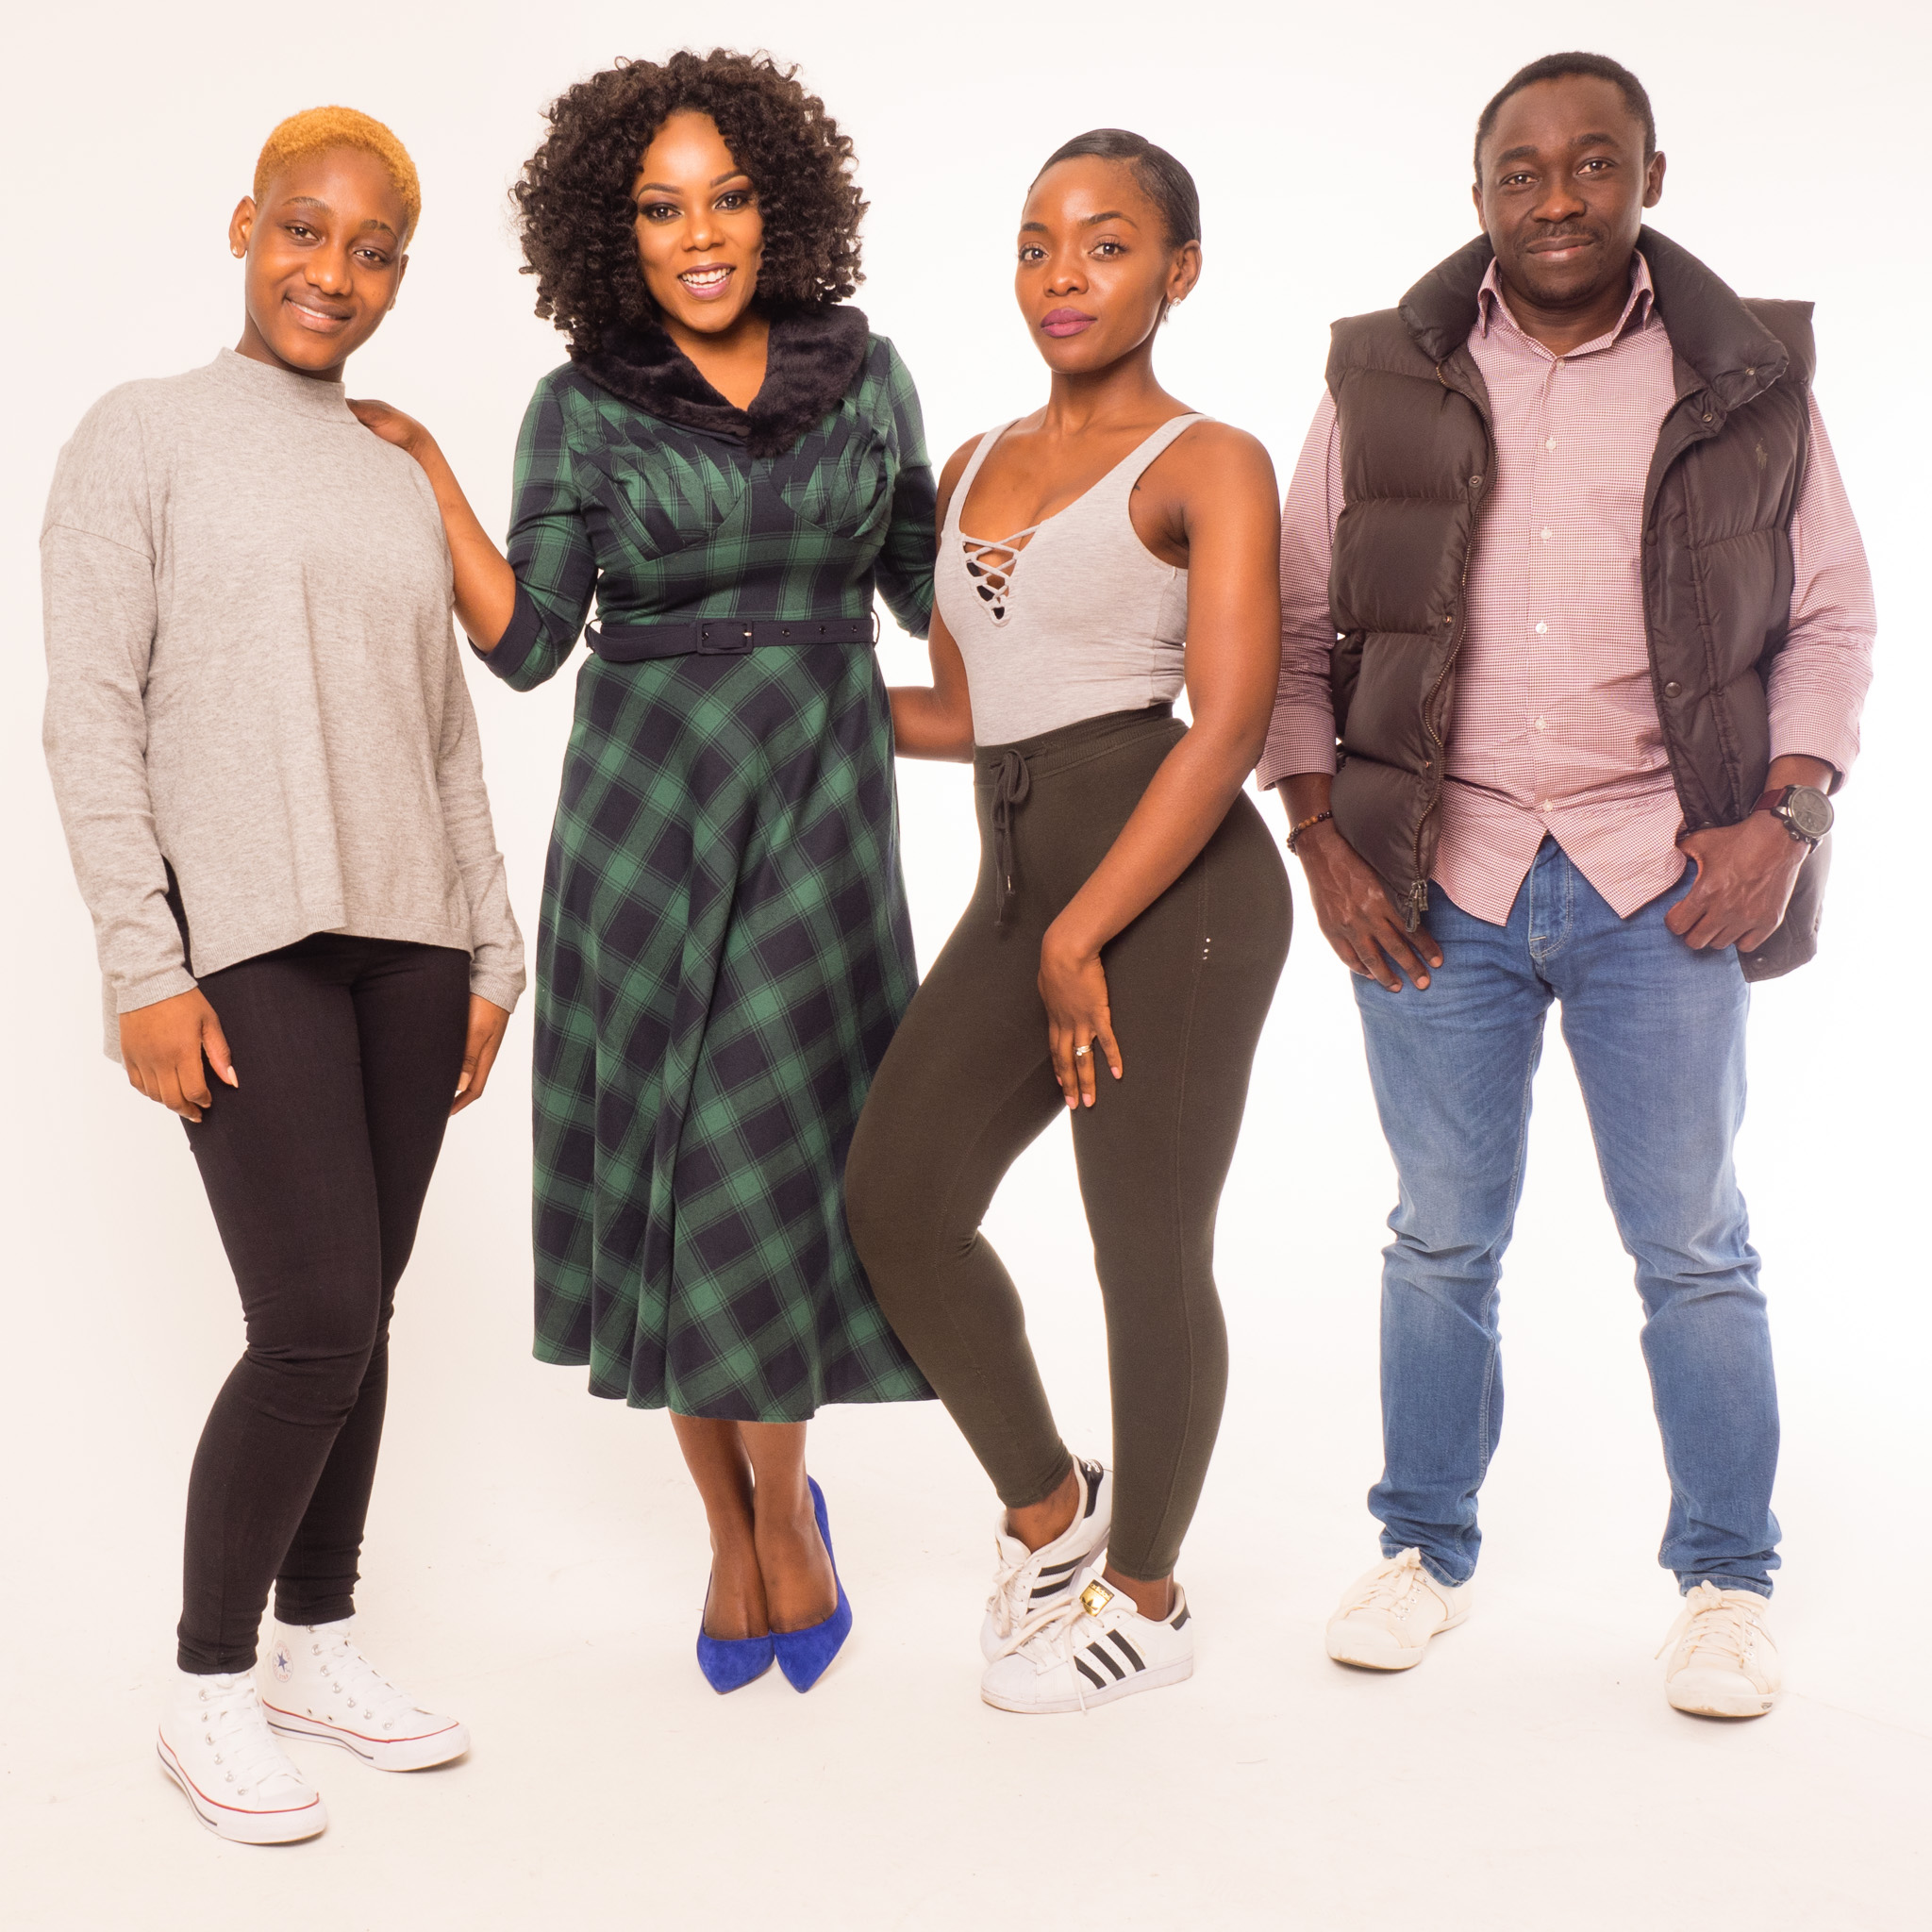
This year I am really pleased to be working with the fashion designer Chiedza Dawn Ziyambe and her team (pictured above) on her 2017 Zimbabwe Fashion Showcase event due to run this summer in London.
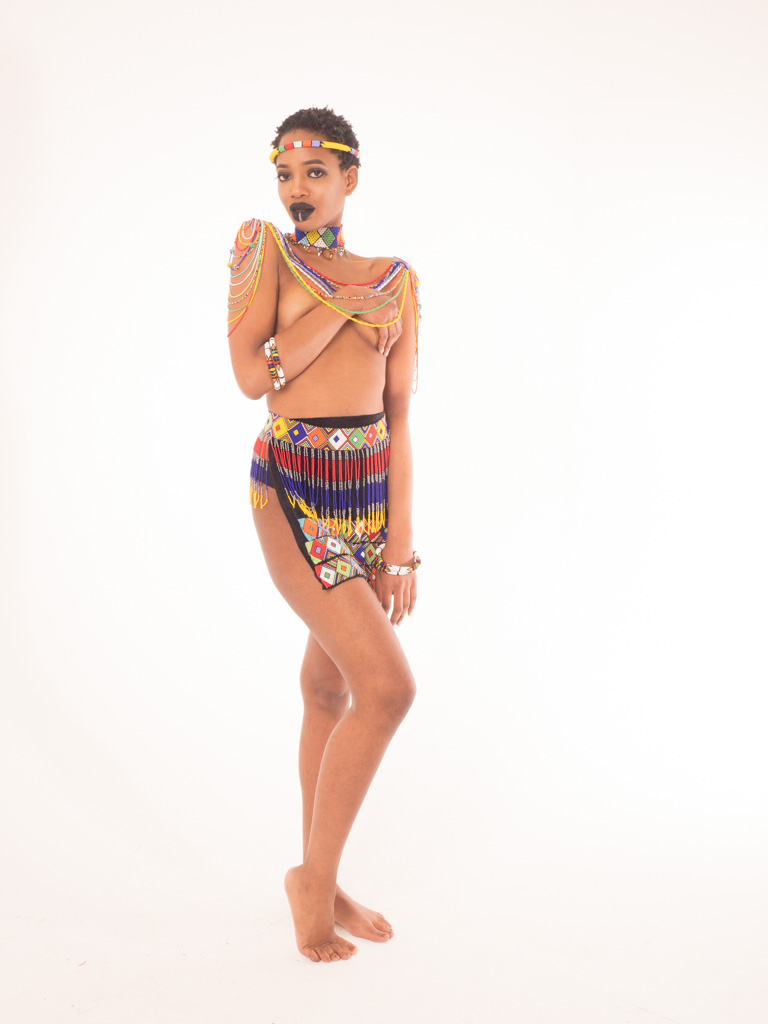
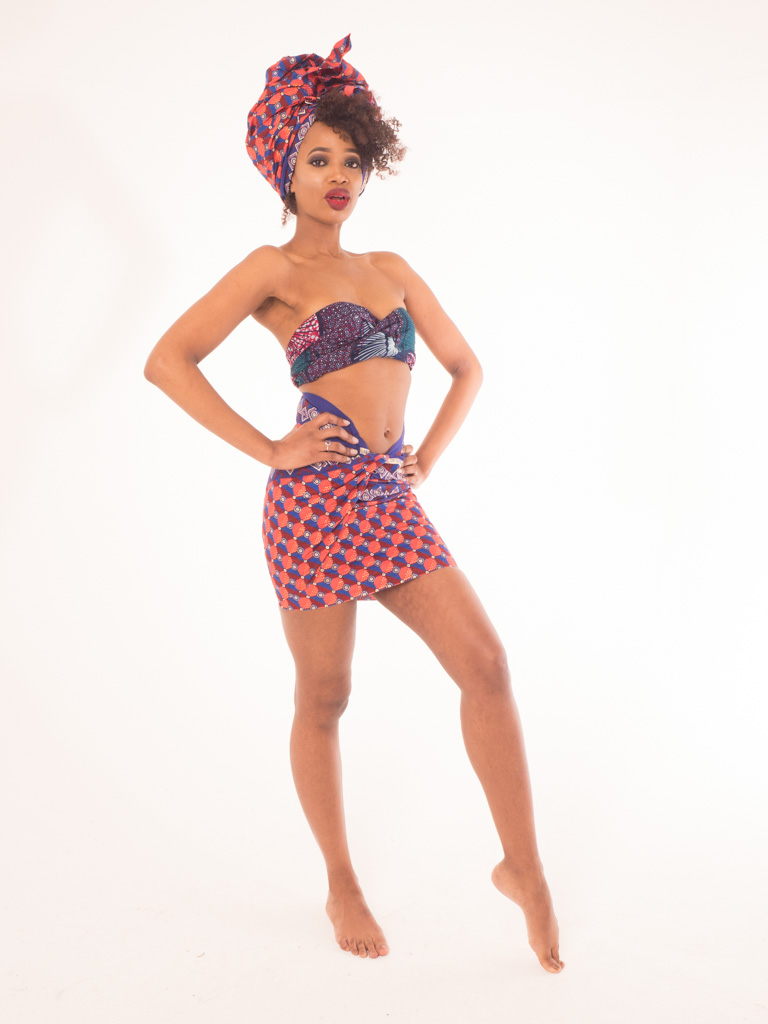
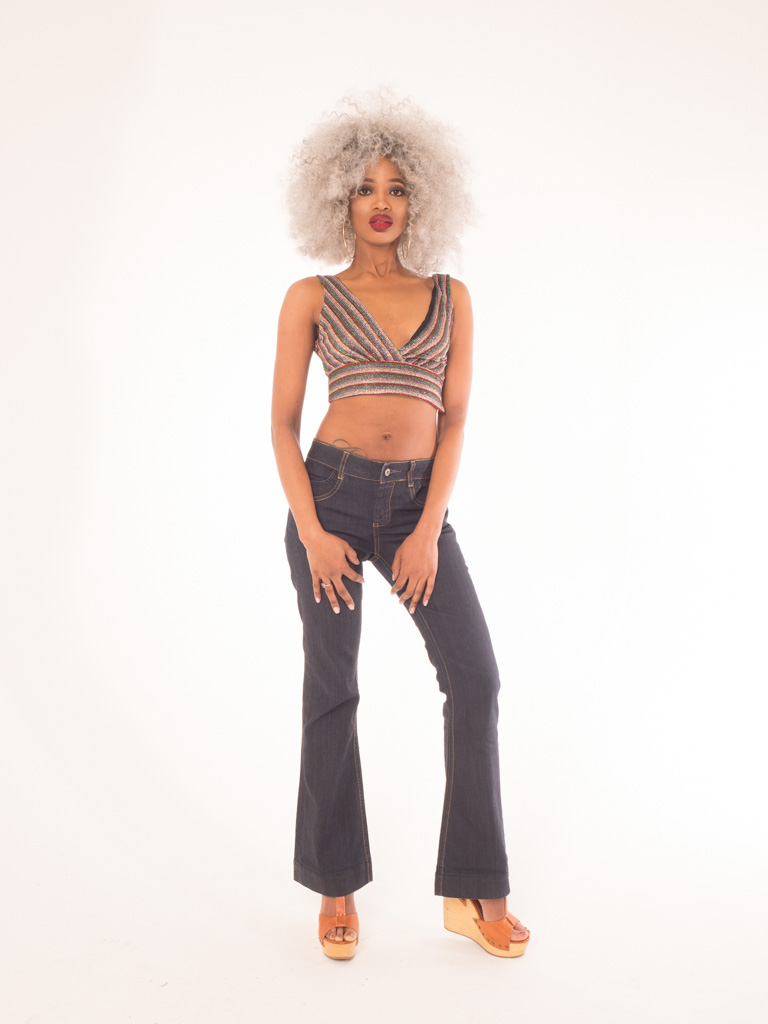
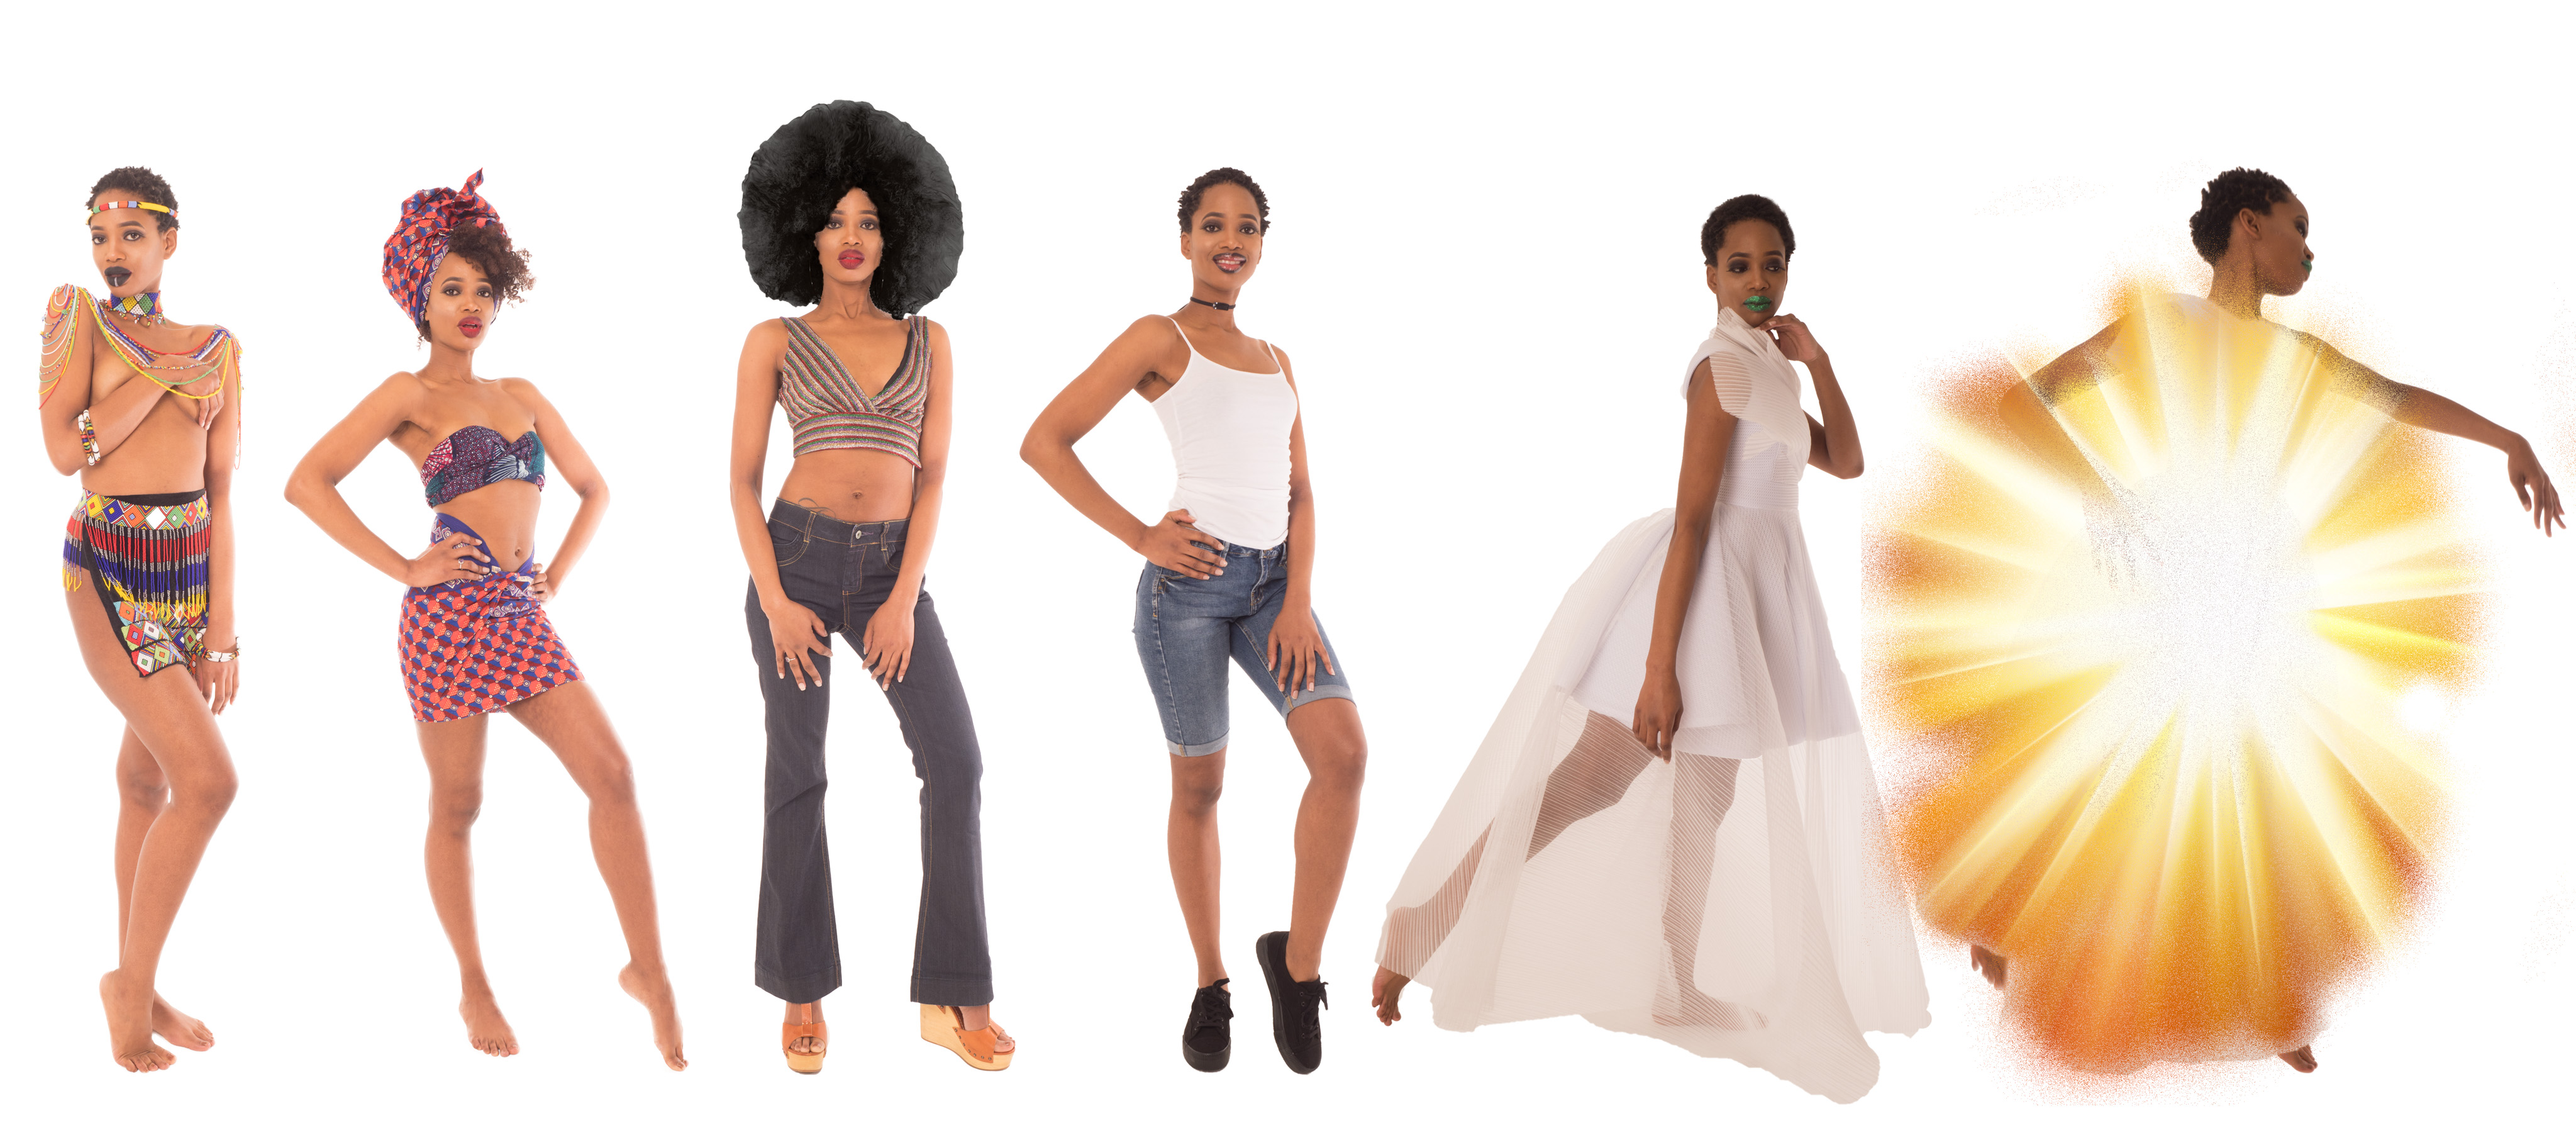
At the beginning of March I worked with Dawn to create one of the publicity shots for this years show whose theme is “Zimbabwe 2030, a glimpse into the future”. The brief was to create a composite image showing five styles of fashion over a period of time with a final, sixth image putting out the question what will fashion look like in 2030? To create the image we worked with the model Linda Ndiweni in different outfits with the plan being to Photoshop them together into a composite.
This turned out to be a great learning exercise for me, both in turns of how to make best use of a small shooting space (in, it has to be said, not the world’s greatest studio) as well as how to use Photoshop to come up with the desired final image.
Here’s the process I followed and the various techniques I used to get the final image.
The Shoot
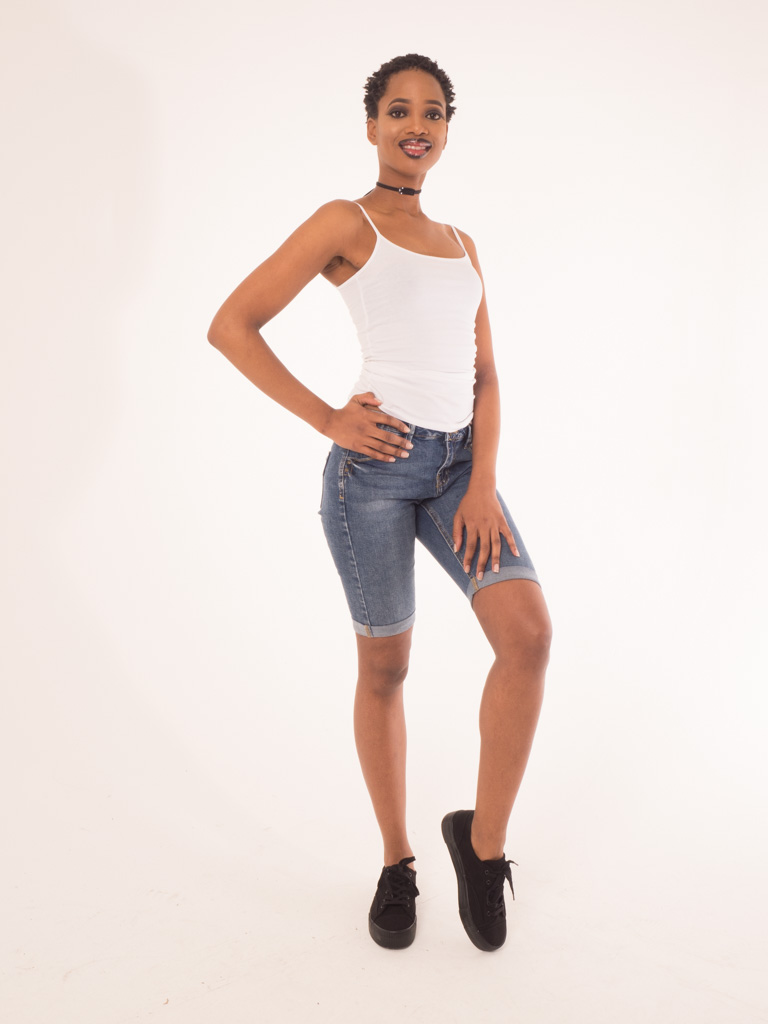
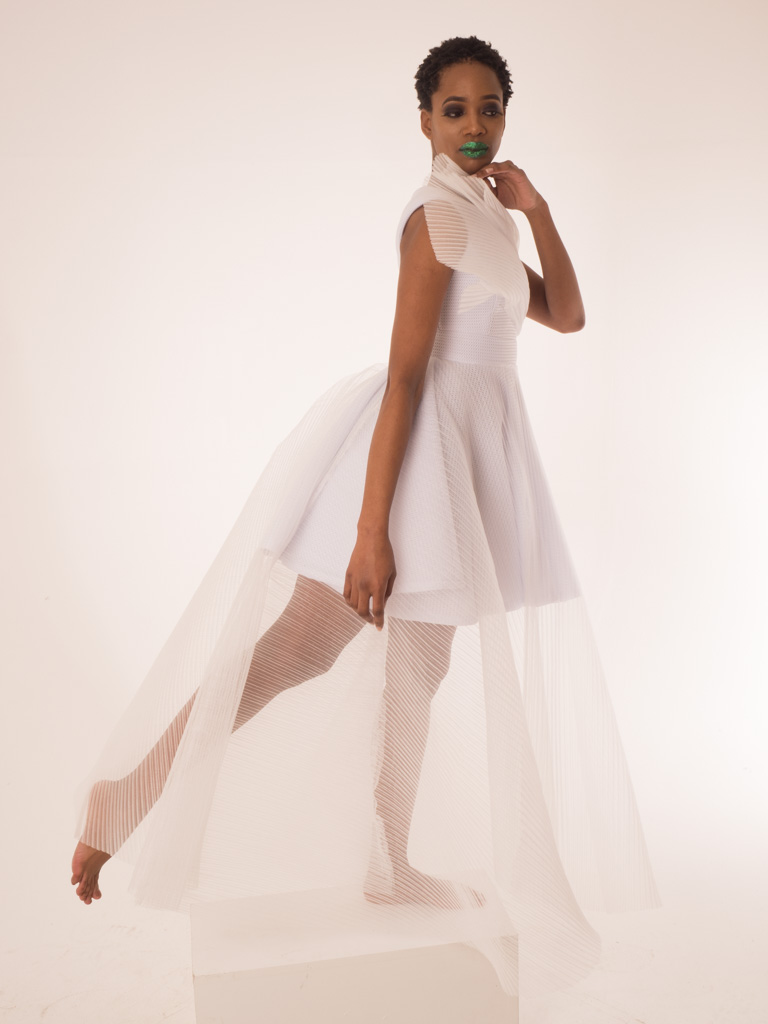
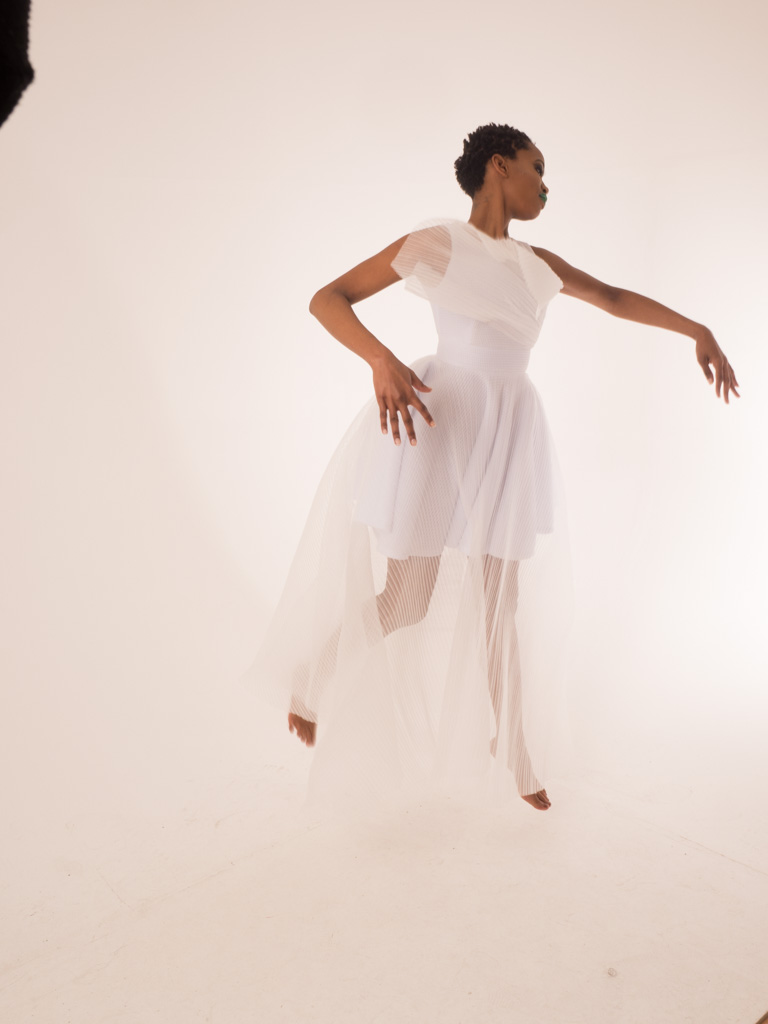
We shot Linda in five different outfits and looks. Each set had 25+ images but here are the six images we agreed upon. The last one, in the white dress, has two because that will appear twice. Click an image to get a larger version with technical info on the shot.
Develop the Images in Lightroom
The first step was to get all the images into a Lightroom folder so I could begin doing some basic ‘developing’. I use my latest cataloguing scheme to organise the images.
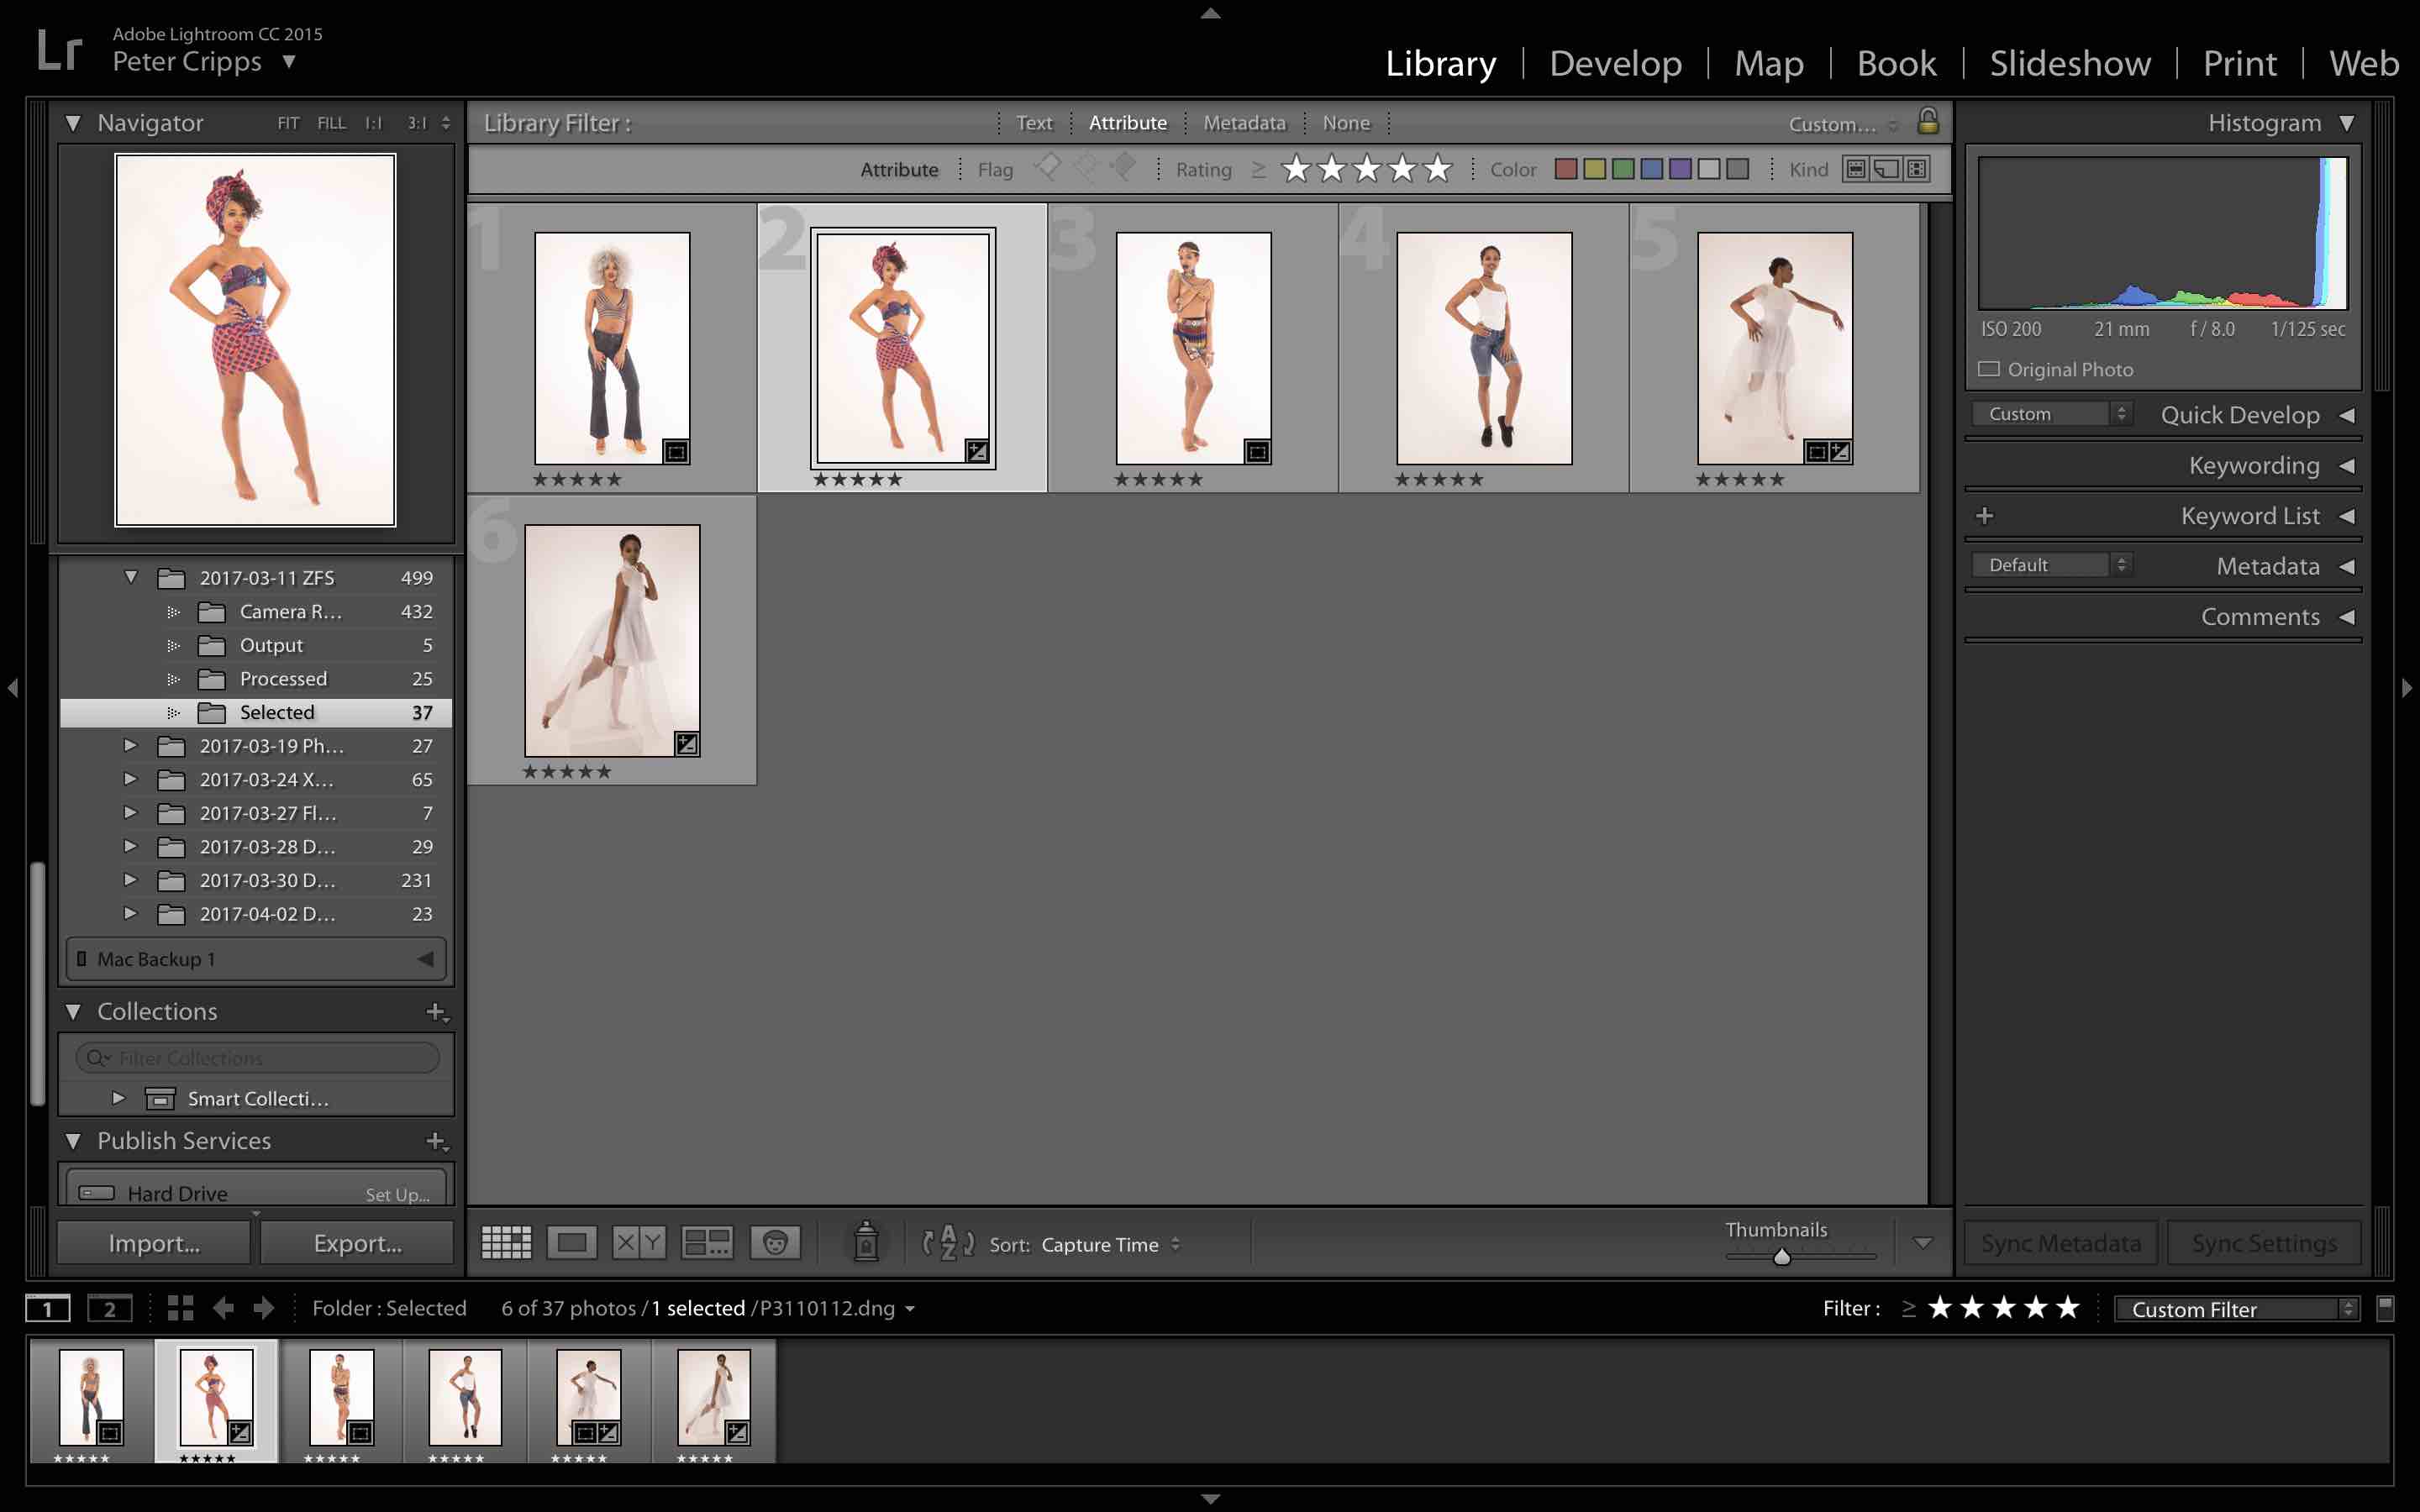
Whilst in Lightroom I ensure all the images have a similar exposure and white balance and perform cropping and straightening etc as appropriate. Once satisfied with the images I export each as a PSD file to the ‘Processed’ folder ready for manipulation in Photoshop.
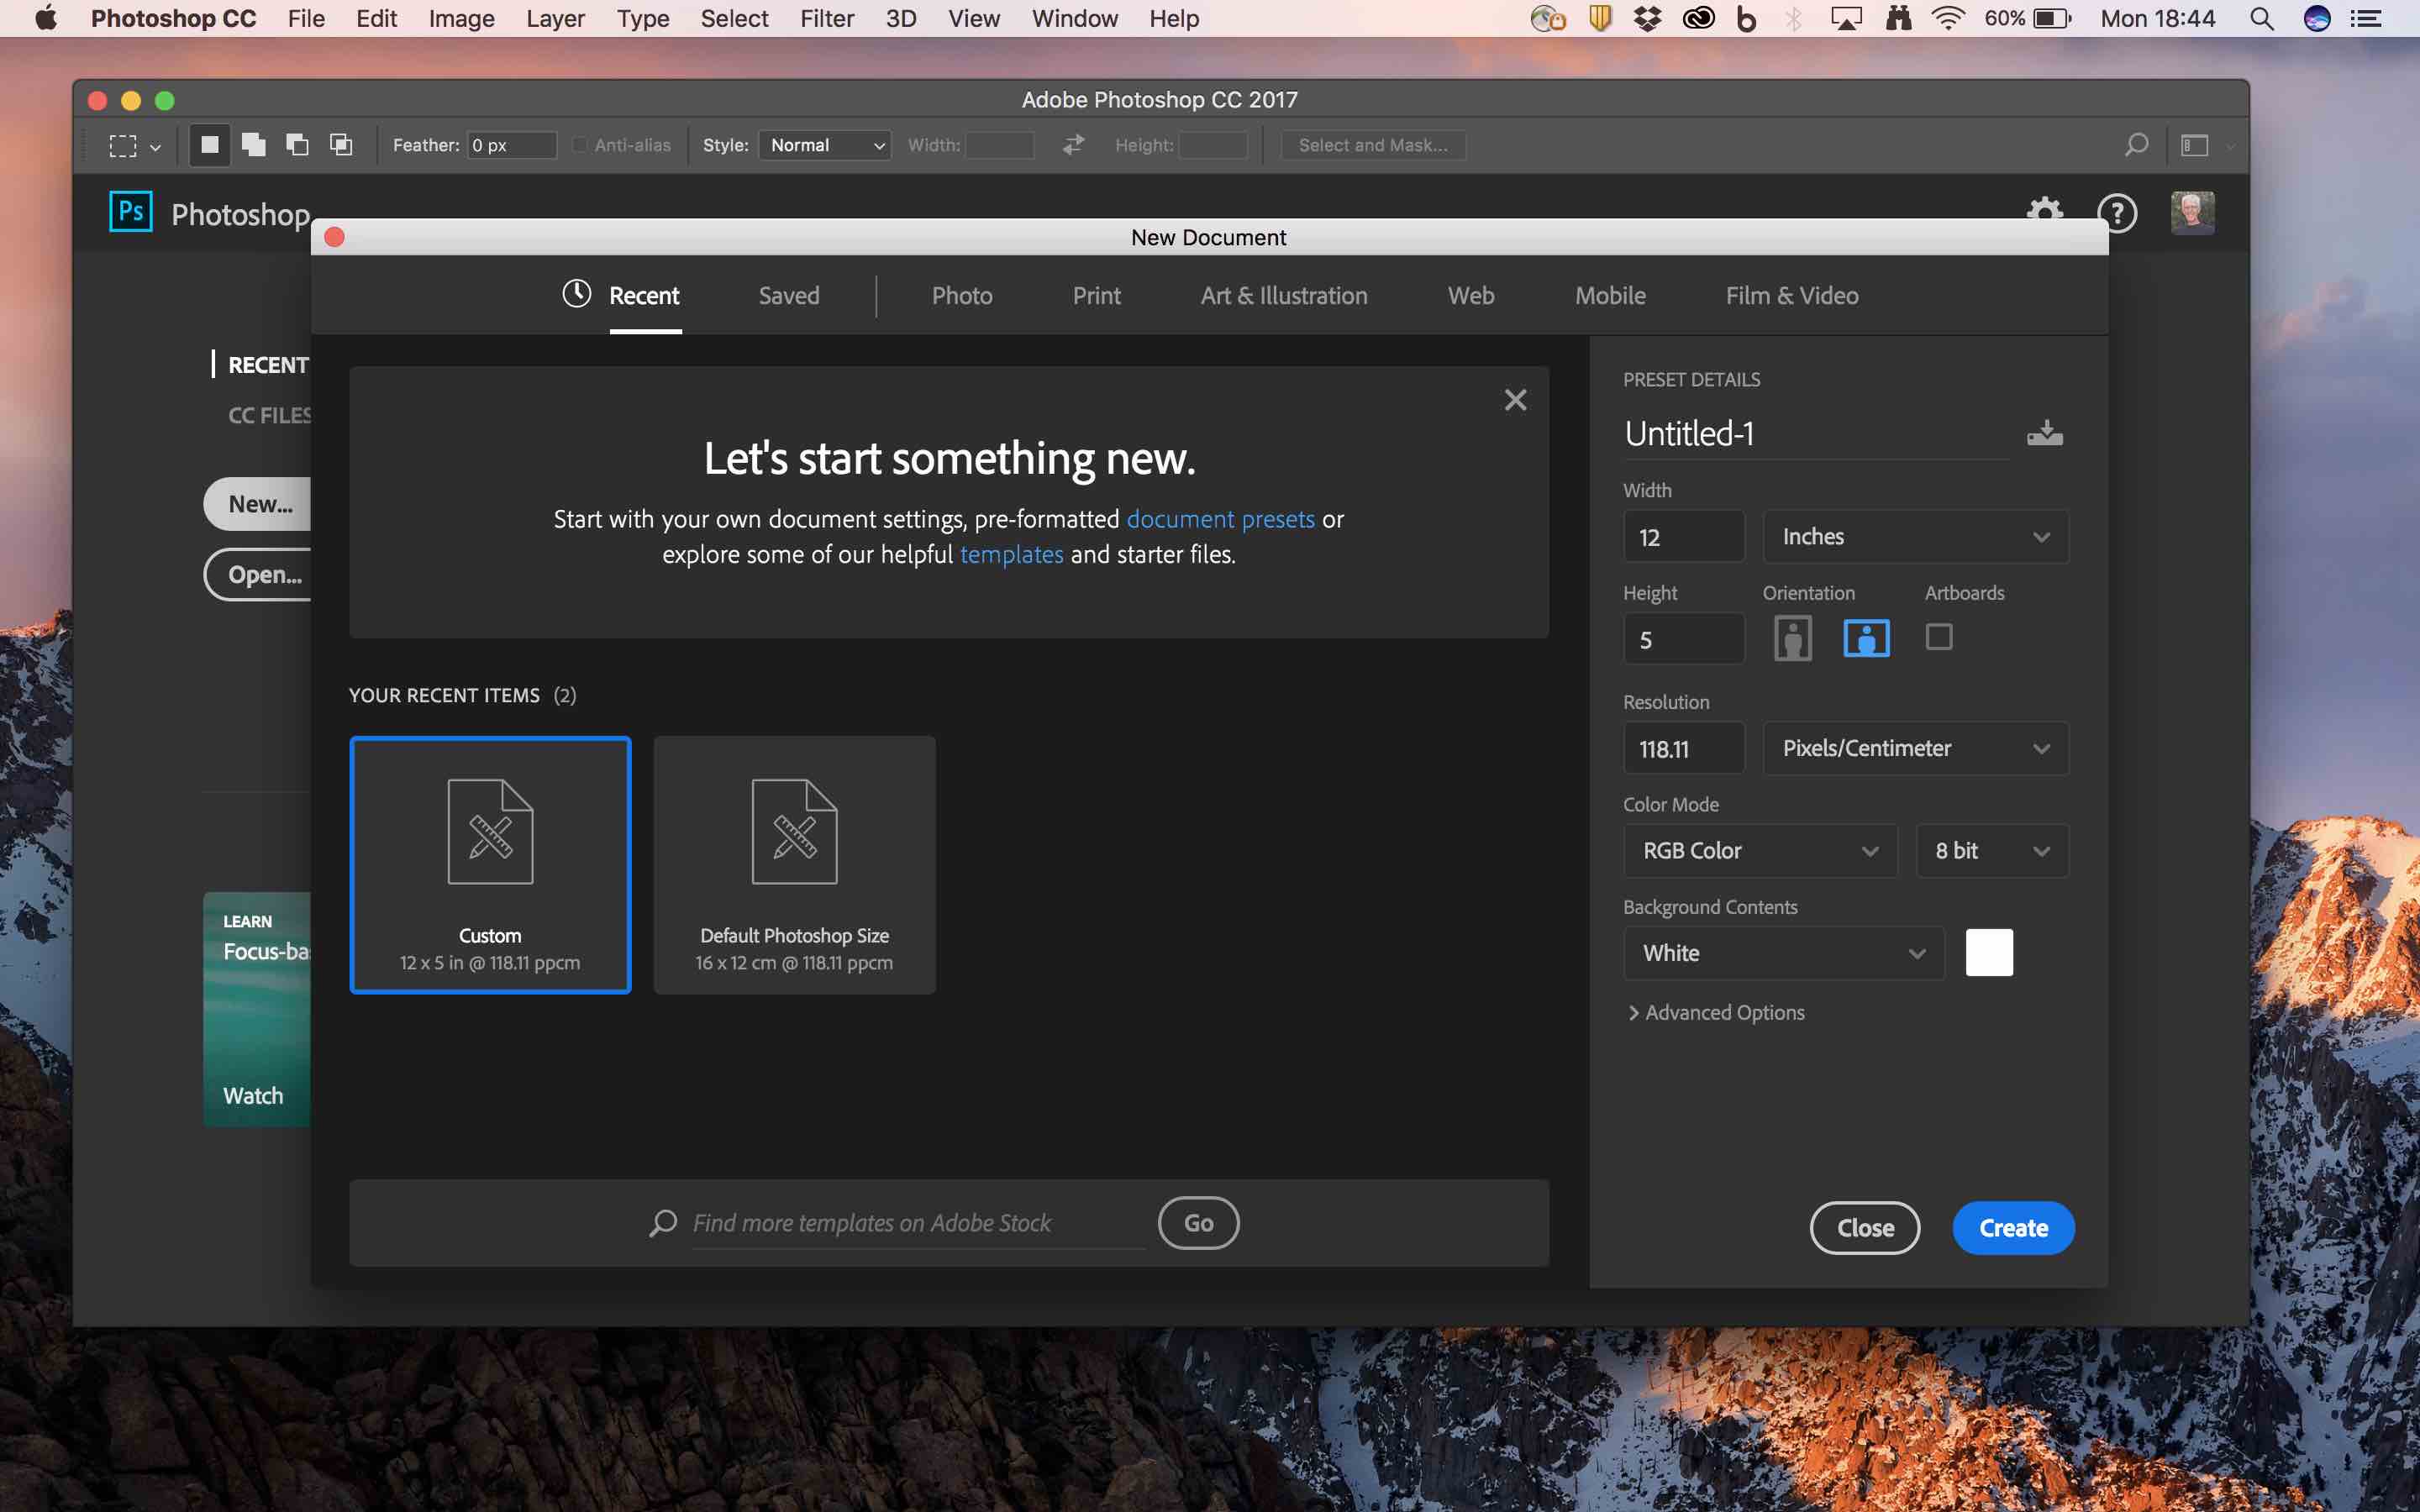
Create a Blank Canvas
Once in Photoshop, and before opening any of the individual image files, I need to create a blank canvas which I will compose each of the images in. This will become the background onto which each individual image will be placed. This is pretty straight forward in Photoshop, just select File/New… from the menu to create a new file of the correct dimensions (12″ x 5″ in this case).
Process and Select Each Image
The next step is to select each of the individual images, doing any further processing as required before placing them onto the blank canvas.
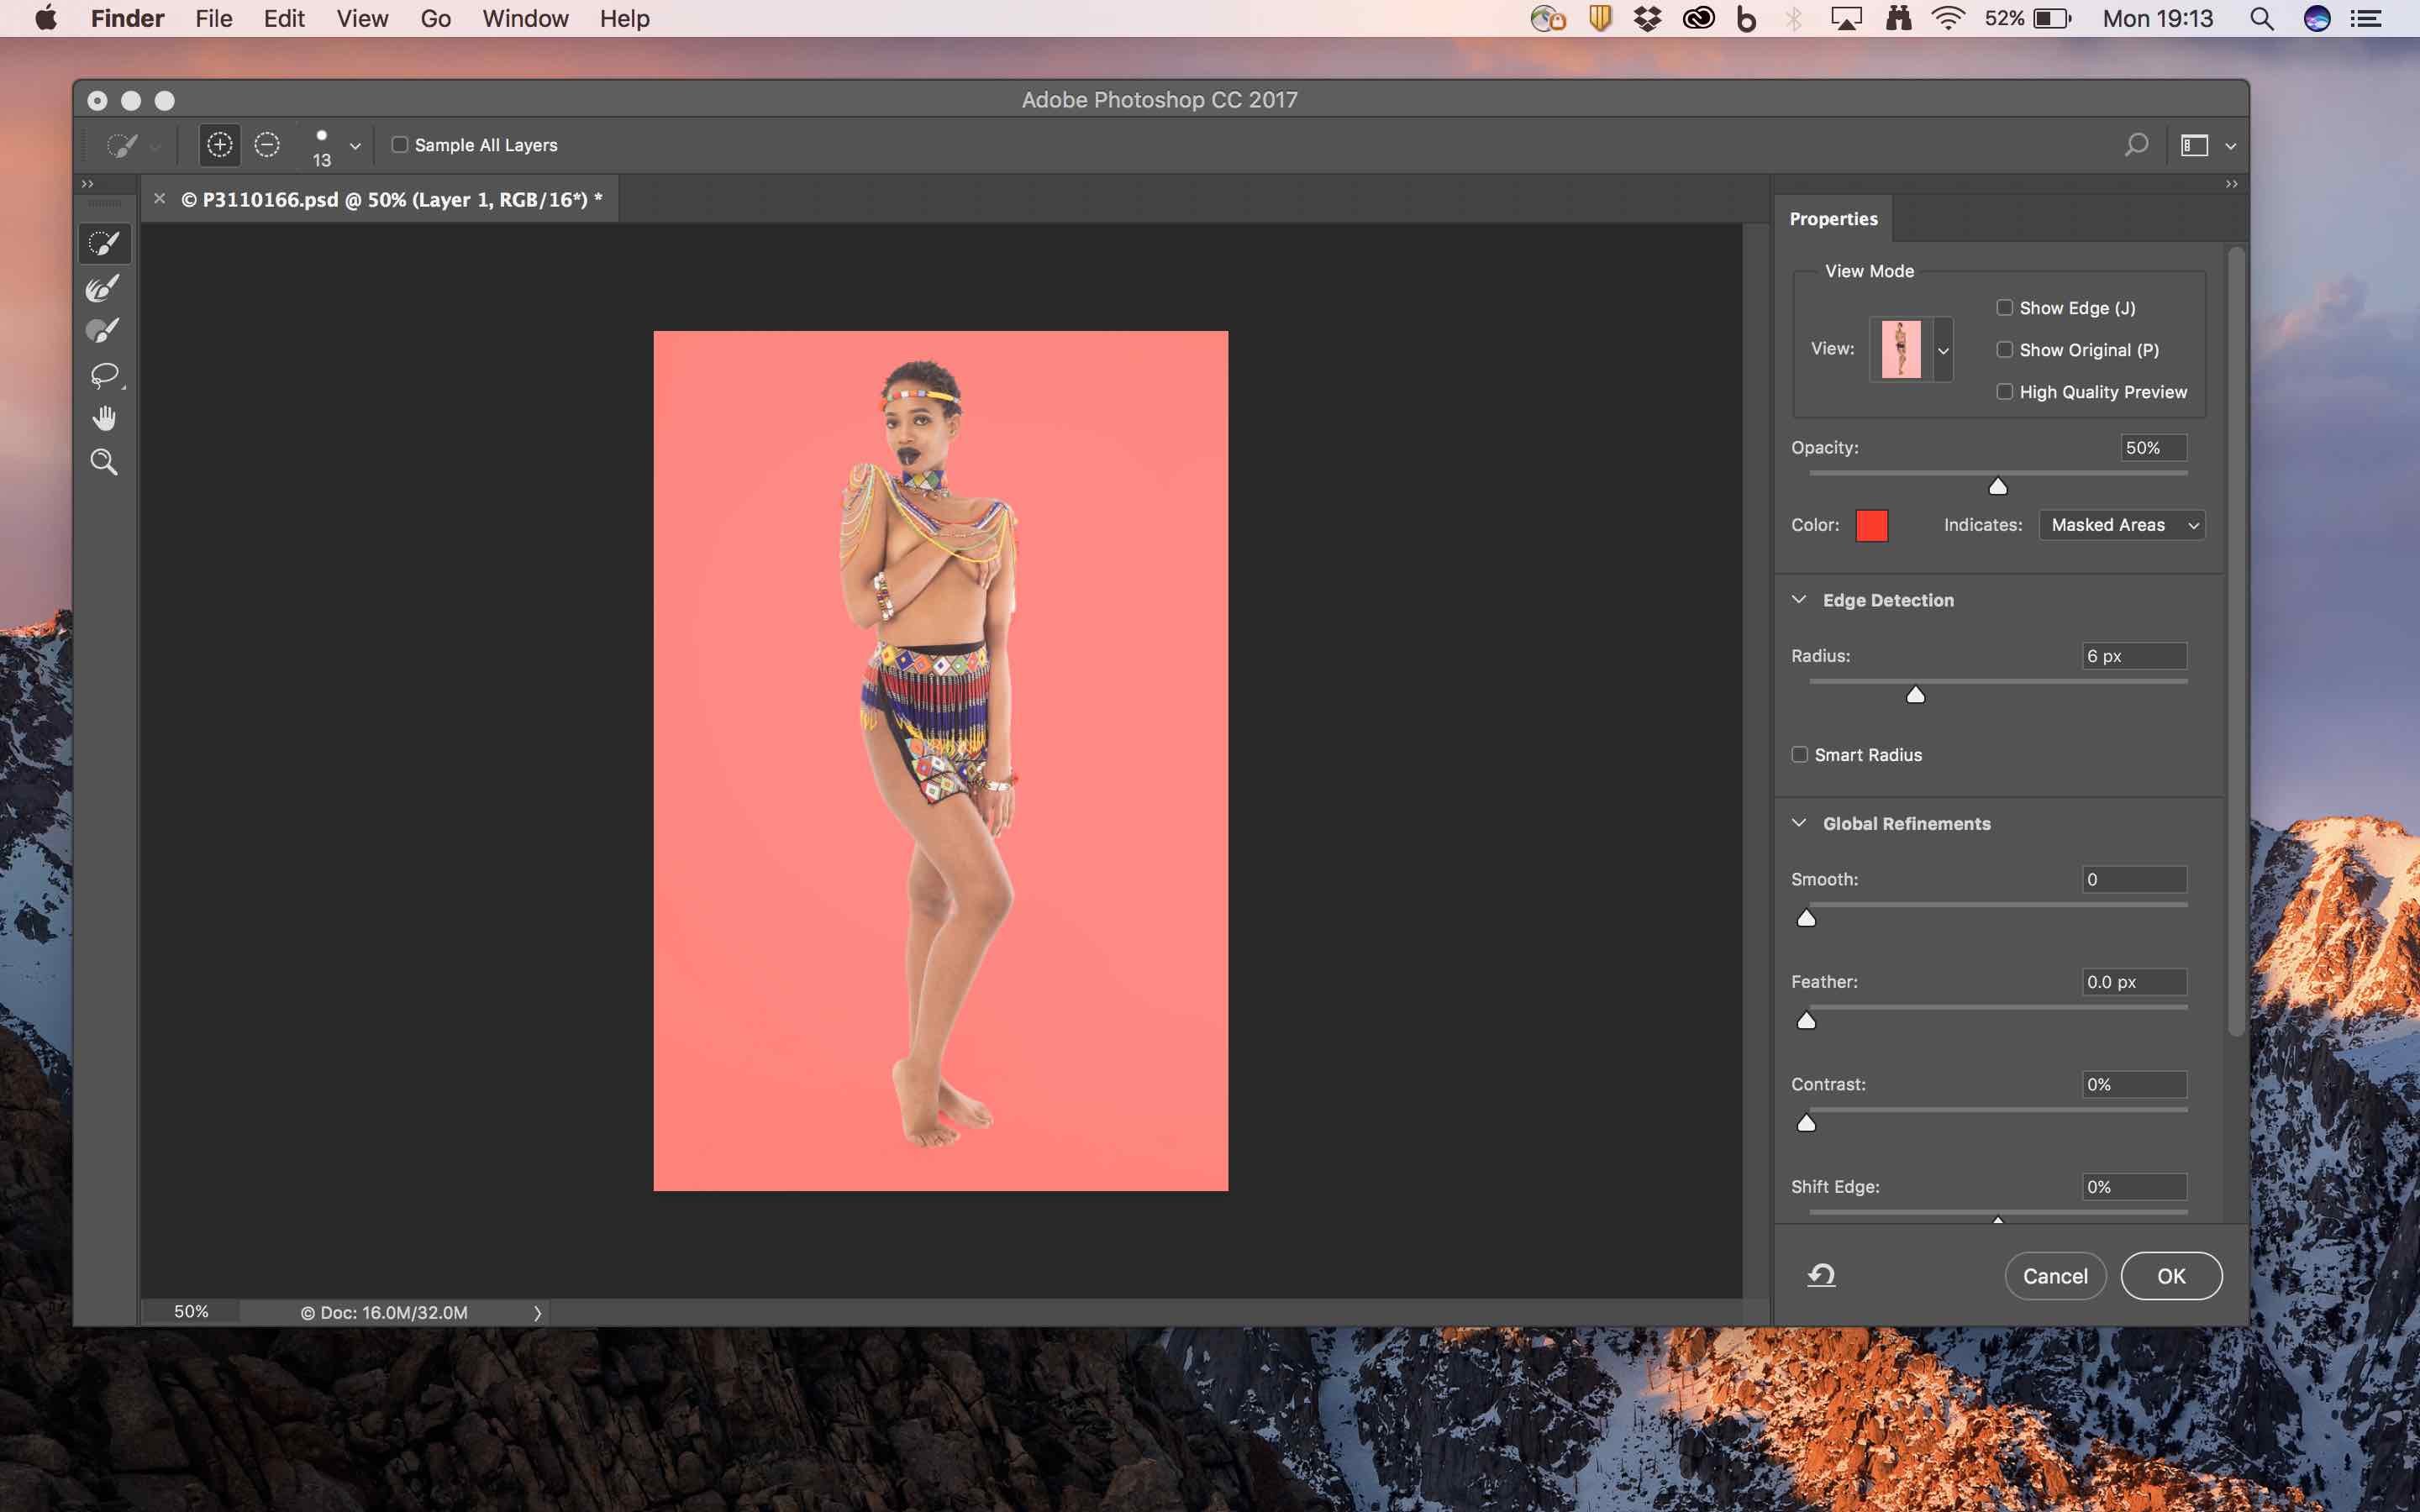
There are great number of selection tools in Photoshop, probably the most powerful is the ‘Quick Selection’ tool with the ‘Select and Mask…’ enhancement. For a description of how to use this tool see this YouTube video by Brooke Shaden as well as this description. The main challenge with cutting people out of an image will be with the hair. In the above example this was fairly straight forward however if you have images where the hair is long and flowing and not separated well from the background you are going to have a tough job ahead. It can be done but requires a good deal of patience and a lot of time.
The major challenge I had in terms of image selection was the one of Linda with the grey afro hair where the requirement was for it to be black! Sounds like a straight forward select and change of colour right, but to make it look even half way authentic requires a fair bit of work otherwise the hair just looks too artificial (even if it is a wig). The best tutorial I found for how to changie hair colour is this one which I followed and was eventually able to get something I was happy with.
Place Images onto the Blank Canvas
Having edited and selected the individual images the final step is to place them onto the blank canvas.
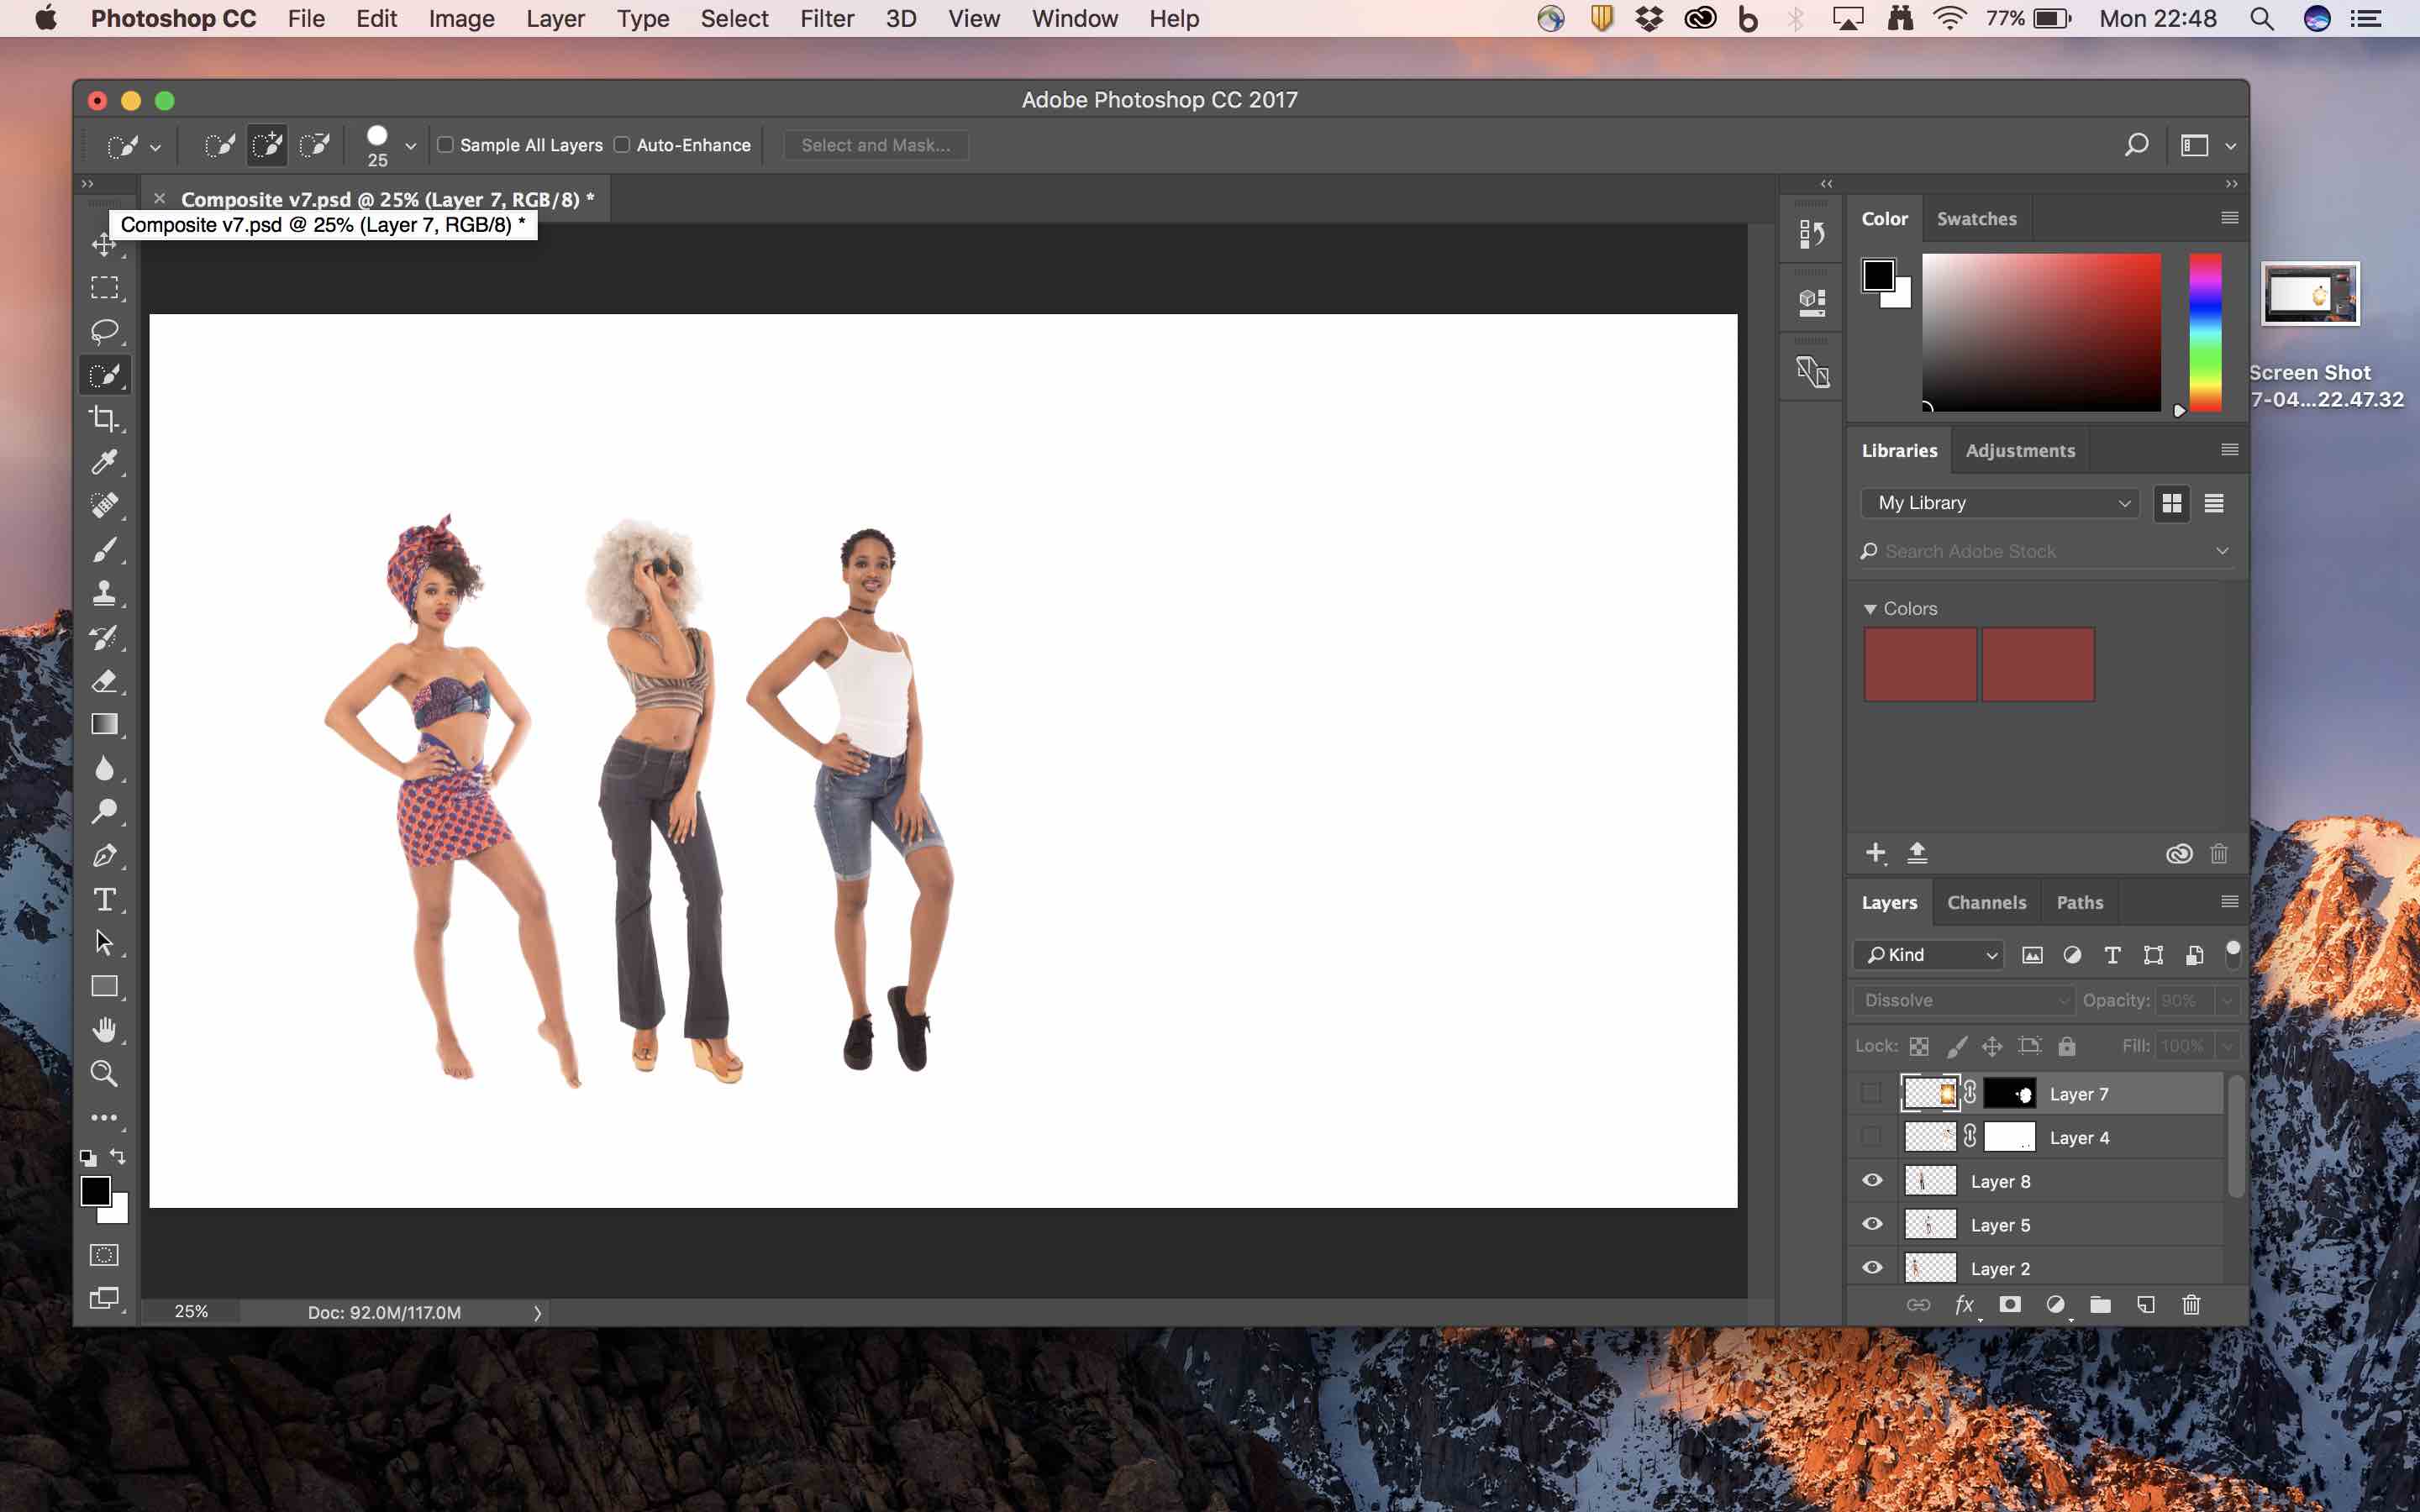
This just involves copying the selected image, switching to the file containing the white background and pasting, then moving, the cutout image to the right position using the ‘Move Tool’.
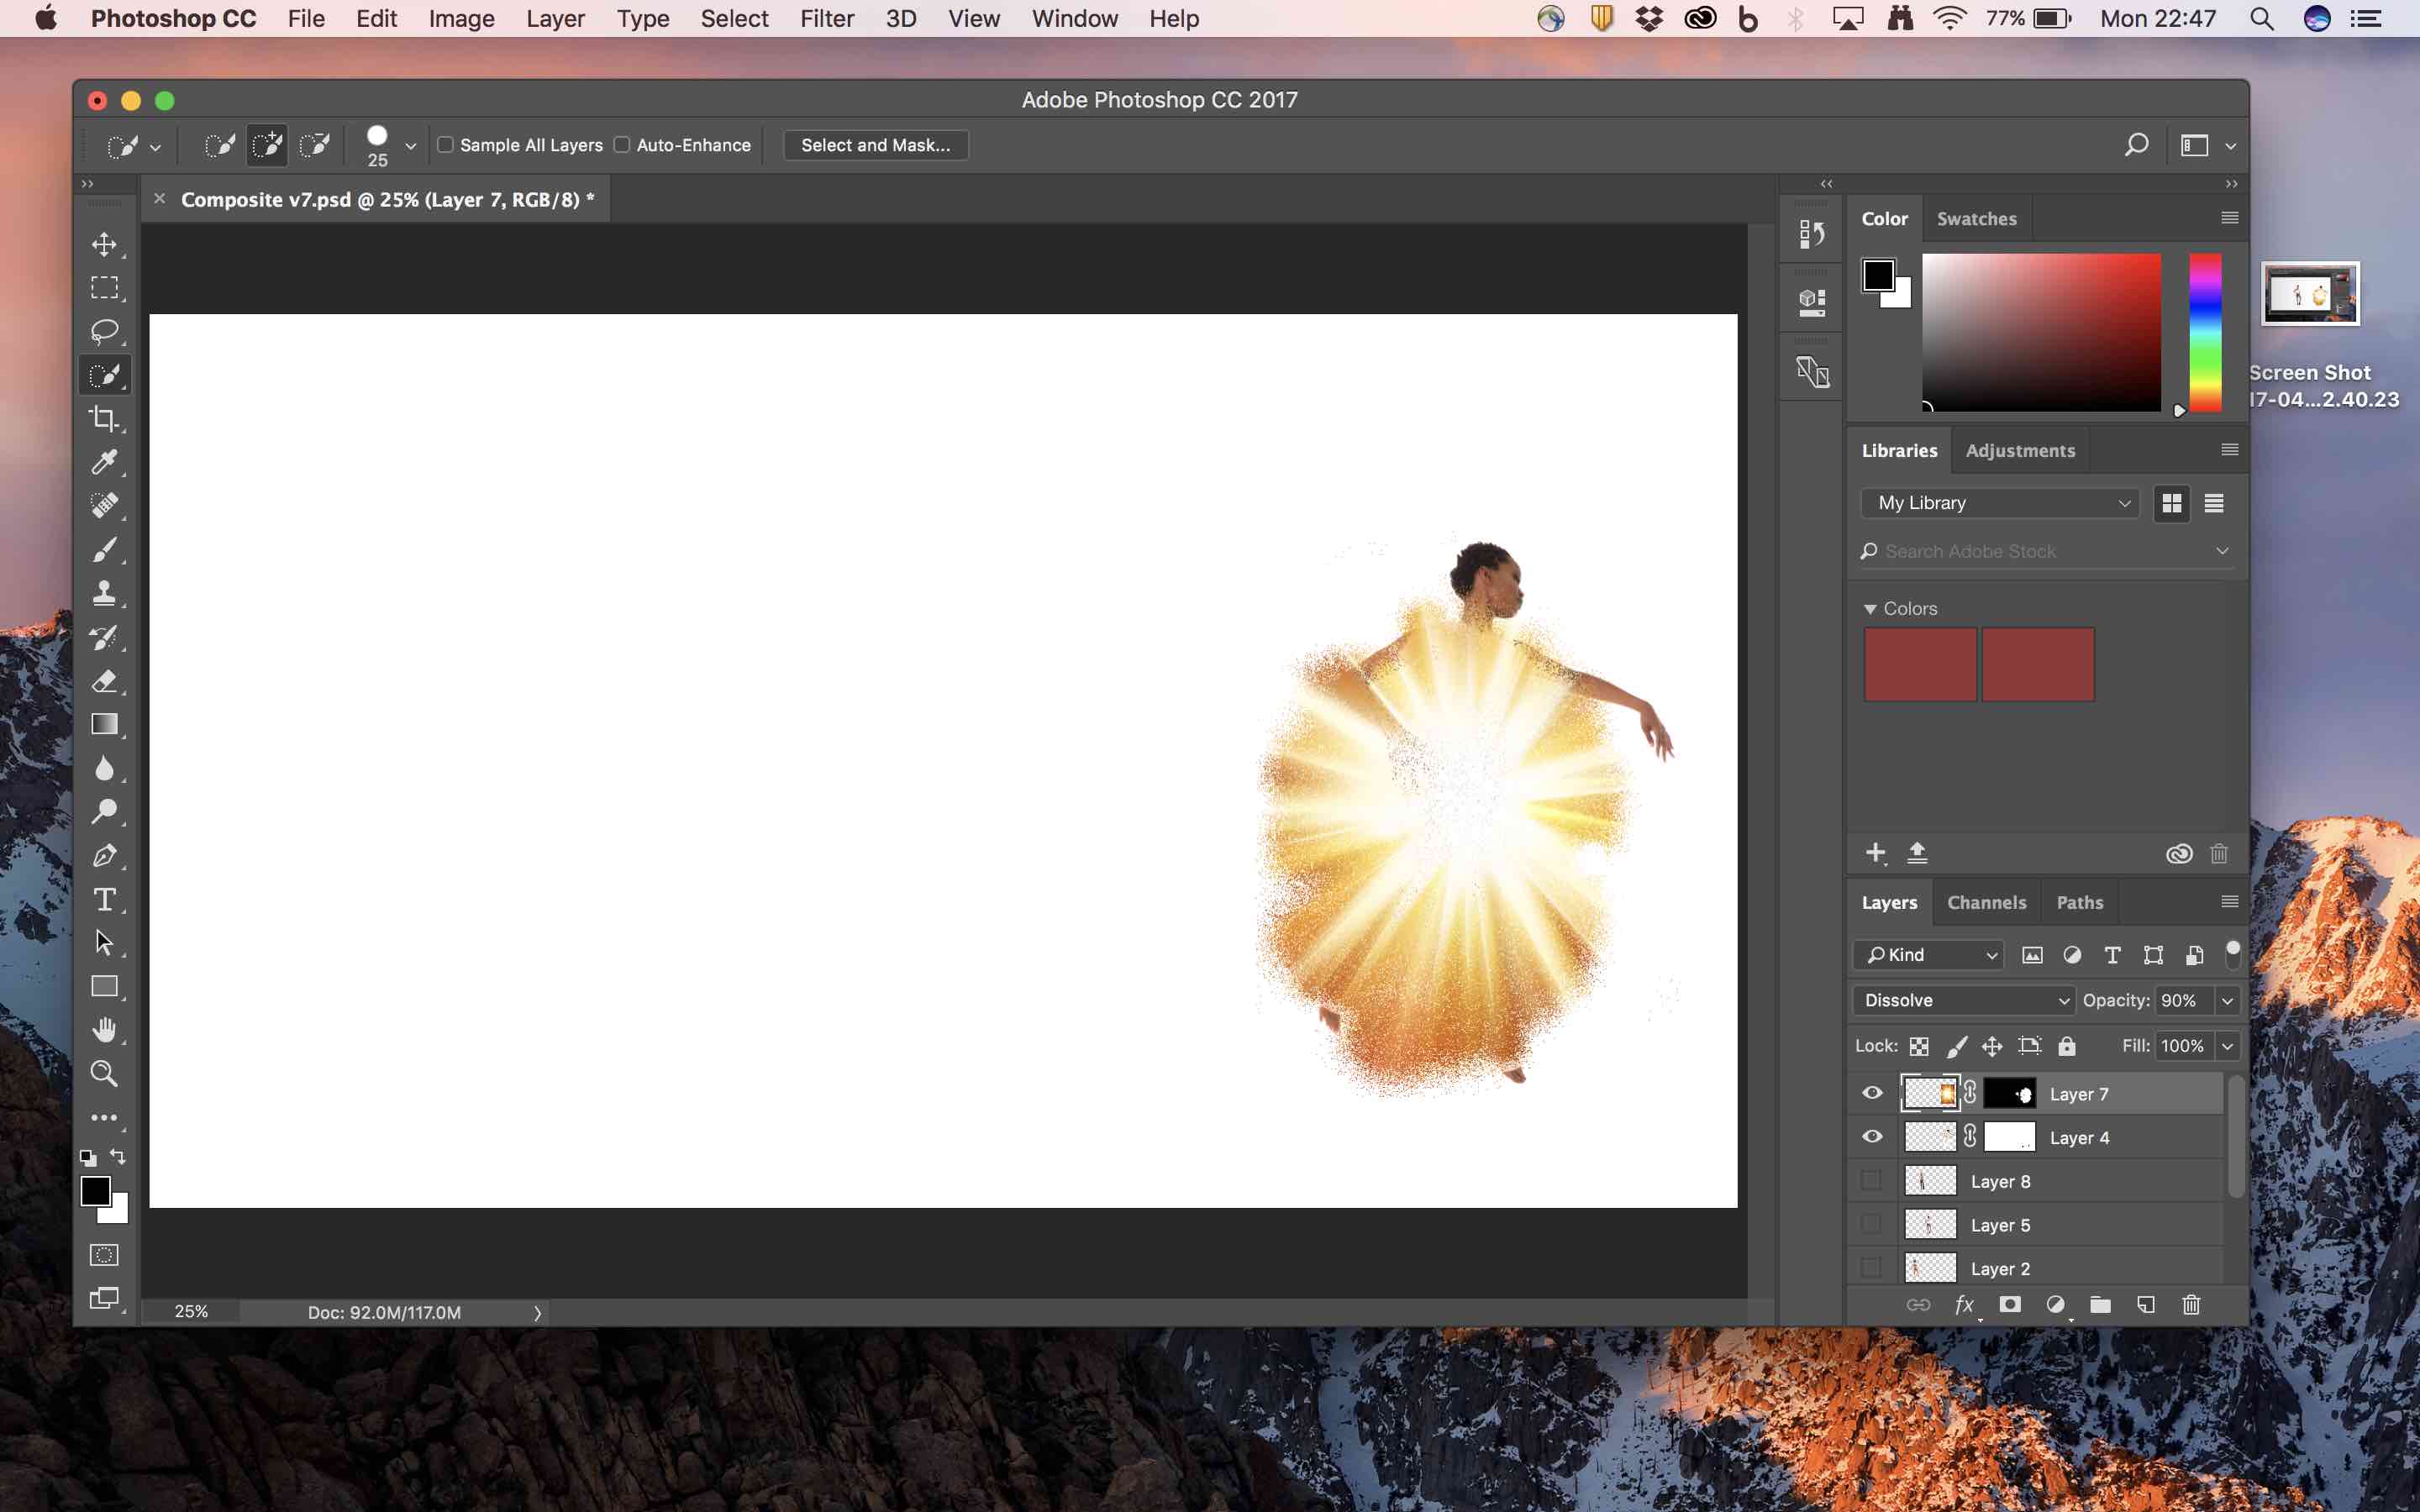
The final challenge was that the last image was to have a starburst effect covering the model showing that the future was still unknown (but bright). This was done by blending a suitable starburst image with one of the selections of Linda.
The Final Image
Finally, here is the composite image created from the individual ones above all edited in the ways discussed.


Leave a comment