In Part 2 of my Learning Lightroom and Photoshop series I showed how to add a different sky to a landscape photograph. Here is the result of that exercise.

Whilst I’m pretty happy with this I think the image could be improved further by making the background a bit blurred to give the effect of depth of field making the house itself out of focus. Here’s a way of doing that in Photoshop.
From Lightroom I open the image to be altered as a Smart Object. Smart Objects preserve an image’s source content with all its original characteristics, enabling you to perform nondestructive editing to the layer. If you right click on an image in Lightroom you get the option to open it in Photoshop as a Smart Object.
The next job is to select the statue which is the bit to remain in focus. As last time I found the best selection tool for this sort of irregular shape is the ‘Quick Selection Tool’. Using this tool I move it around inside the area of the statue (i.e. holding the left mouse button down) and watch how the tool selects the outline of the statue. Where some parts outside the statue are selected you can remove these by holding down the ‘Option’ key on a Mac and moving the tool over those areas. Making the image bigger (‘Cmd +’) helps to select the right area. Further refinement can be done by selecting ‘Refine Edge…’ at the top of the edit window. From here you can change the ‘View Mode’ to get different highlight effects and also use the ‘Edge Detection’ tool to tidy up edges. Once I’m happy with the selection I close the ‘Refine Edge…’ dialog box then invert the selected area (Select/Inverse) so that everything outside the statue is selected. Now for the blurring.
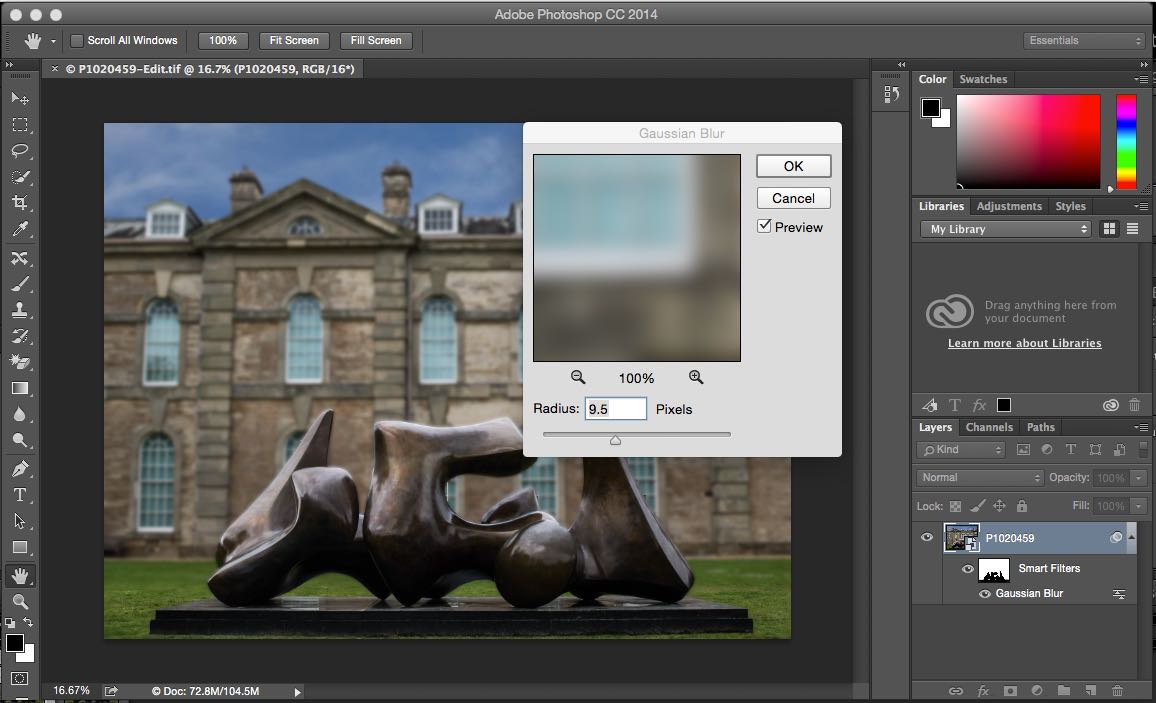
From the Filter menu select Filter/Blur/Gaussian Blur… This opens up the ‘Gaussian Blur’ dialog as shown below. By moving the slider you can change the amount of blurring in the image. Around ’10’ seems to give the right effect. Note that because I now have the background selected the blurring only gets applied to that.
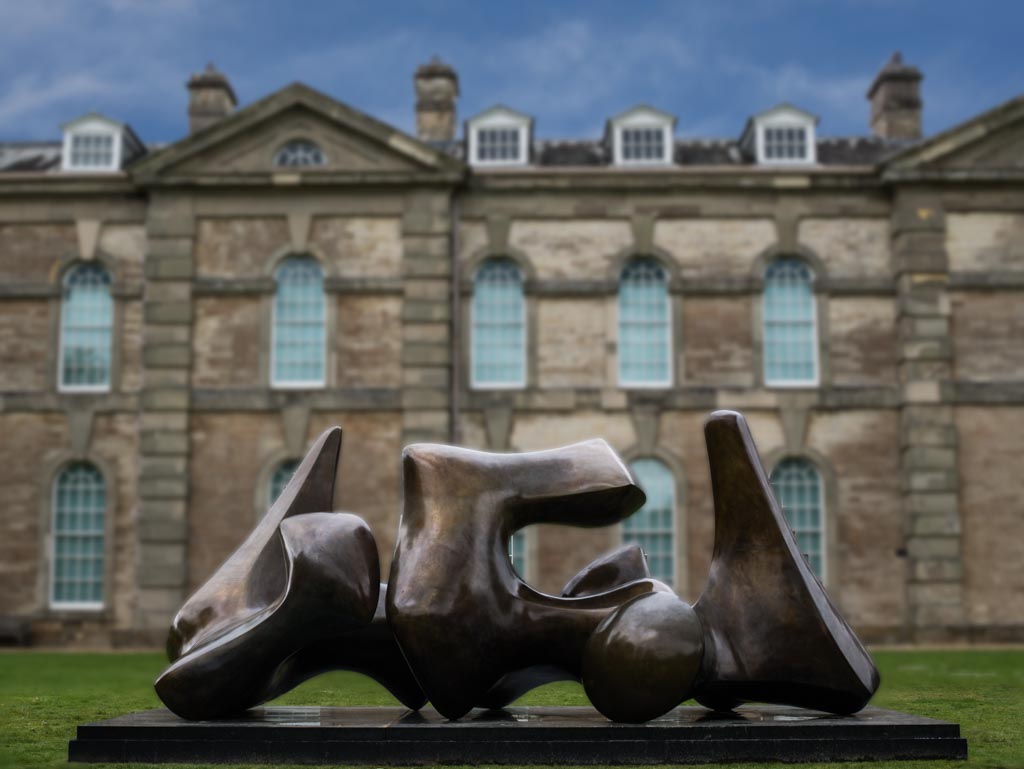
Whilst this looks pretty good one more refinement will improve it further. We need to make all of the foreground (i.e. to the left and right of the statue and a little behind it) in focus as well otherwise the image looks a little false. To do this I first select the ‘Smart Filters’ mask in the layers panel then select the ‘Brush Tool’ from the tools palette. Because I want to brush away the blur and reveal the original image underneath I select black as the foreground colour which reveals what’s underneath. By selecting the brush size appropriately and brushing to the left and right of the statue I can remove the blur from the grass and make it appear in focus. Here’s the final image.
Finally I save the image. For now I just do a File/Save which retains all the layer information (but is a large file therefore). If I want to reduce the size and did not have the need to re-edit it again in the future I could ‘flatten’ the image (remove the layers) using Layer/Flatten Image. Keeping the layer information means, for example, I could go back later and change the amount of blurring if I decided I wanted more or less. That’s it for now though, I’m pretty happy with the way the image looks.
To get a bit more detail on blurring backgrounds see this video.


Leave a comment